Team Dialogue can be used for traditional Team Development Plan, but also many other things such as project teams across the organisation, project evaluations, management meetings or staff meetings. The module has the same functions as EDP, where you can create tasks and set deadlines for them and receive reminders. In Team Dialogue you can make any employee within the Team Dialogue team responsible for a task.
1. Go to Team Dialogue
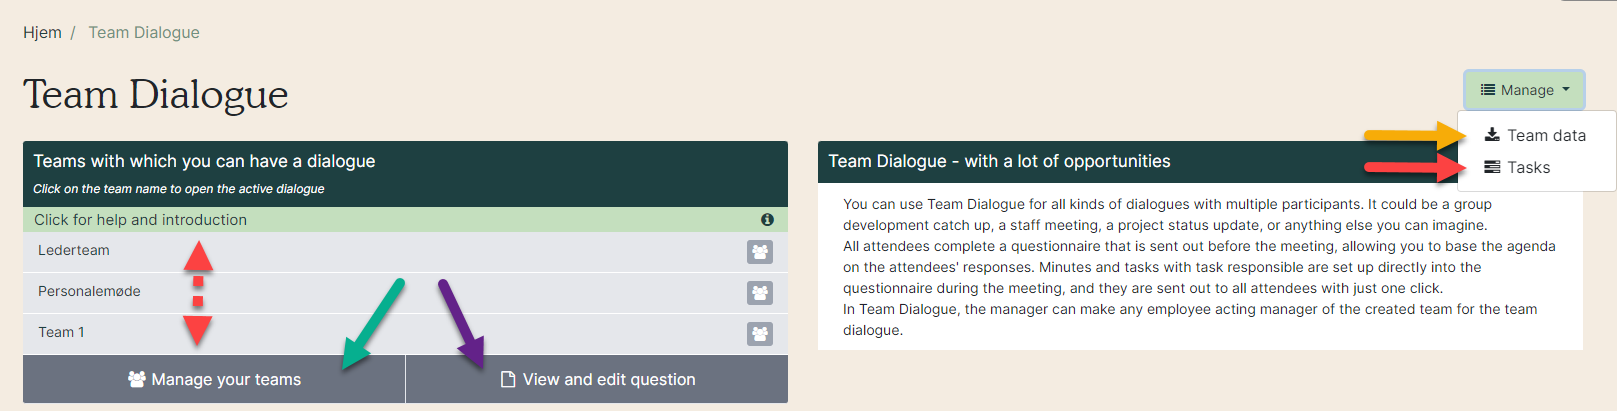
You now have these options:
- Red dotted arrow: Your teams.
- Green arrow: Create teams or rearrange employees in teams.
- Purple arrow: View and edit the questionnaire. See the manual here.
- Yellow arrow: When you click the Manage button, you can export data.
- Red arrow: Overview of your Team Dialogue tasks.
2. Manage teams
You can easily create a new team and add employees.
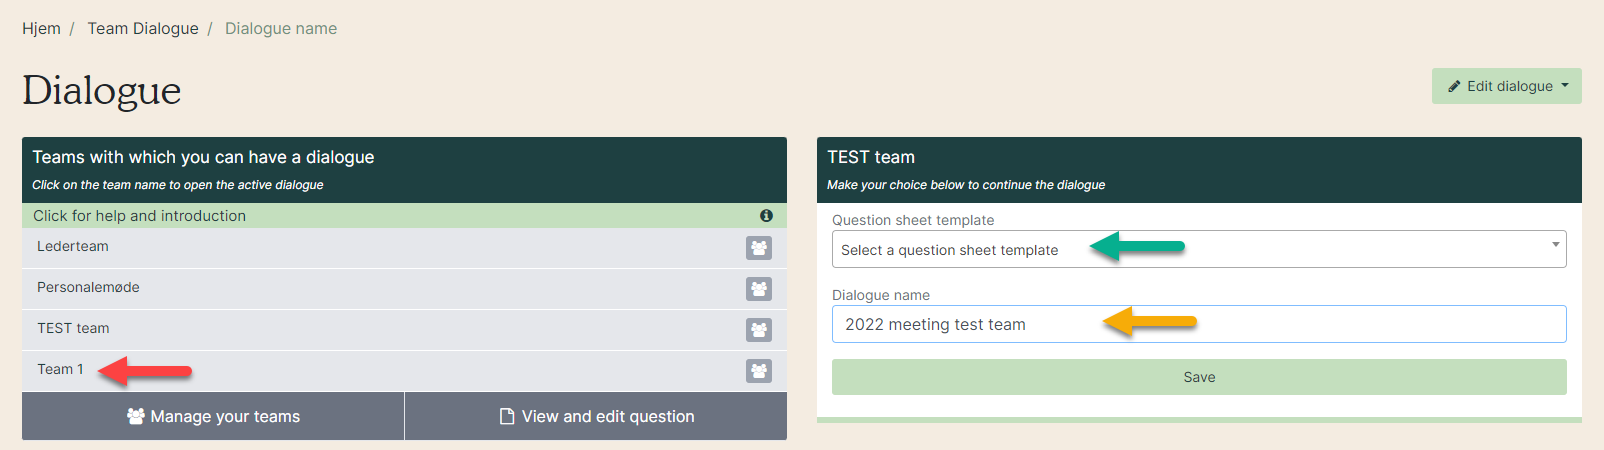
3. Start a dialogue
When your team is created, you can start a dialogue. Click on the team name (red arrow) and the box to select a questionnaire will become visible on the right. Select the questionnaire to send out (green arrow) and give the dialogue a name (yellow arrow). Click “Save”.
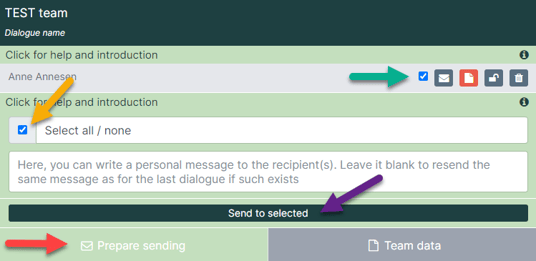
4. Now you can start sending out the questionnaire for the dialogue. Click on the box 'Prepare sending' (red arrow). When you click on it, it unfolds and turns green as in the image below.
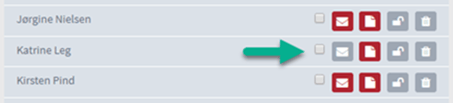
You can choose to send to all employees in the team (yellow arrow). It is also possible to send to individual employees. You just tick the little box next to their name off (green arrow).
In the white box you can write a personal message to the employees. This message will be included in the standard email.
When this is done, click on ”Send to selected” (purple arrow).
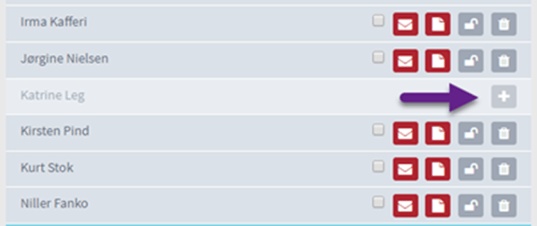
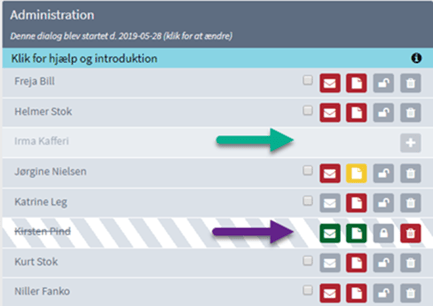
5. If an employee is added to the team after a TDP dialogue is started, there is a plus icon next to the employee. If the person needs to be added to the round, click on the plus (purple arrow).
6. Once the employee has been added to the team, the envelope is gray because no mail has been sent to this specific employee yet. If a questionnaire is to be sent out to the employee, click on the prepare sending box and the email is prepared (see the step above).
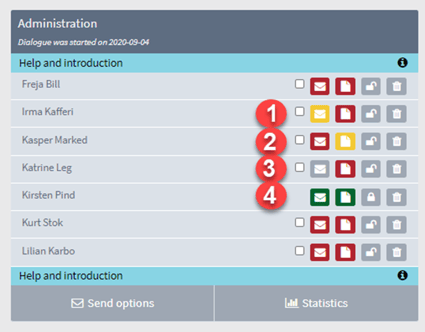
7. The envelope color shows how far the employees are with their answers.
- Yellow envelope: The questionnaire has been opened but not completed and sent back.
- Red envelope: The questionnaire has not been opened.
- Gray envelope: No questionnaire has been sent.
- Green envelope: The questionnaire has been completed and sent to the manager.
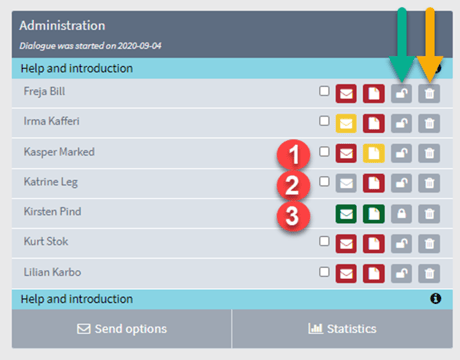
8. The color of the minutes shows the status on the team manager’s end.
- Yellow minutes: The minutes are open but not finished and not sent to the employee
- Red minutes: The minutes have not been opened yet
- Green minutes: The minutes are completed
The gray padlock (green arrow) shows whether the form has been handed in (locked) or not (open). If the padlock is closed and the employee wants to correct his answer, the manager can unlock the form by clicking on the padlock. If you want to remove an employee from the TDP dialogue, click on the trash can (yellow arrow).
9. If you remove an employee who has not yet completed their questionnaire, you will see a plus icon next to their name (green arrow). If the dialogue is completed when the employee is deleted, the employee will appear crossed out (purple arrow). Their completed questionnaire is still a part of the statistics for the dialogue even though the employee is deleted.
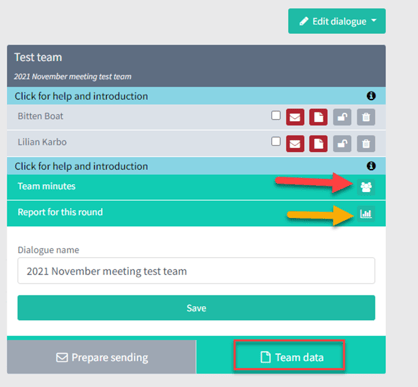
Team data
10. Click on ”Team data” (red square) to get these options:
- Red arrow: Write a team minute for the entire team with tasks and deadlines.
- Yellow arrow: See a total report based on all the team members answers to the questionnaire.
11. In the team minute, you can read each participants answers, write the group minute and create tasks.