Before starting the survey, a questionnaire must be created. See how to create the questionnaire in the manual to create questionnaires. When the questionnaire is done, the survey can be started.
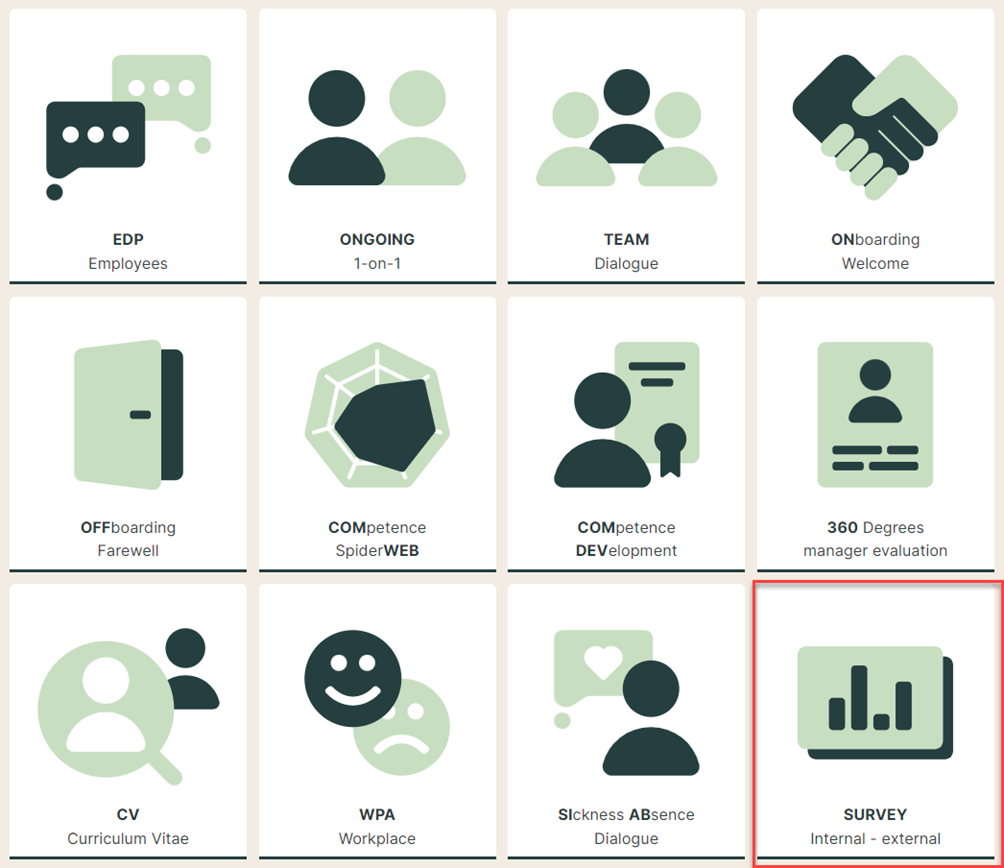
1: Go to survey on the front page.
No access to survey? See this manual on how to configure survey.
2: Survey overview
Here are the following options:
- Red arrow: Previous/current surveys
- Green arrow: See tasks in survey
- Yellow arrow: Create new survey

3: Create survey
Click on '+ New survey'

4: Select External survey
Click on 'External' (red arrow).
- External survey is build from scratch with any organizational structure.
- Internal survey is locked on your company’s organisational structure. See manual on internal survey.
The internal survey is good for well-being surveys within the employees, and the external survey is good for customer satisfaction surveys or surveys for external partners.
This manual is about the external survey.

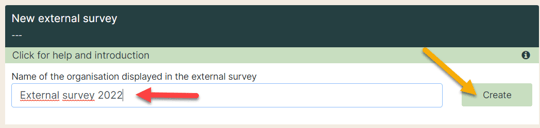
5: External organisation
Give your external organisation a name (red arrow) and click “Create” (yellow arrow).
6: Departments and teams
You can create departments (red arrow) and teams (yellow arrow).
Under a department you can create more sub departments or teams. At least one team must be created.
Be aware that there must be a minimum of 4 participants in the entire survey, so there can be created a team of 4 participants.

7: One step forth and one back
To proceed, return to the overview of external organizations by clicking on "New external survey" (red arrow) to go there immediately.

Or follow point no. 3 and 4.

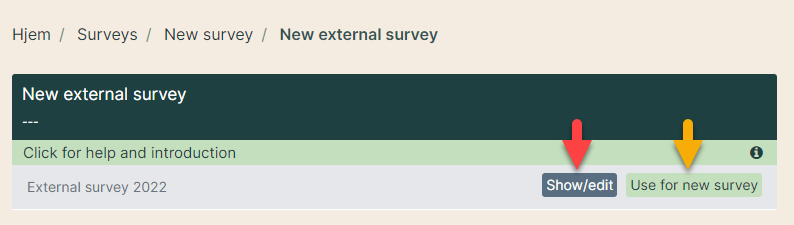
8: Edit the organisation or start a new survey.
Here you can either edit the external organisation (red arrow) or start a new survey (yellow survey).
9: Select questionnaire and anonymity
If "Use for new survey" is selected in point no. 8, fill out the following:
- Select questionnaire for the survey.
- Select if your survey is anonymous or not anonymous. If you want the survey to be anonymous, tick off the box. If anonymous is selected, it will be anonymous for everybody in the organisation.
- Click on ’Create’ to continue.

10: Name of the survey, date and text
- Name of your survey e.g. Customer satisfaction survey 2025.
- Set a start date. Today or previous dates can't be selected, but tomorrow and onwards can. Survey is sent out at night to the participants.
- Set an end date for the survey.
- Write a text for the employees to be sent with the survey link. This is not mandatory.
- Finish by clicking ’Save’.

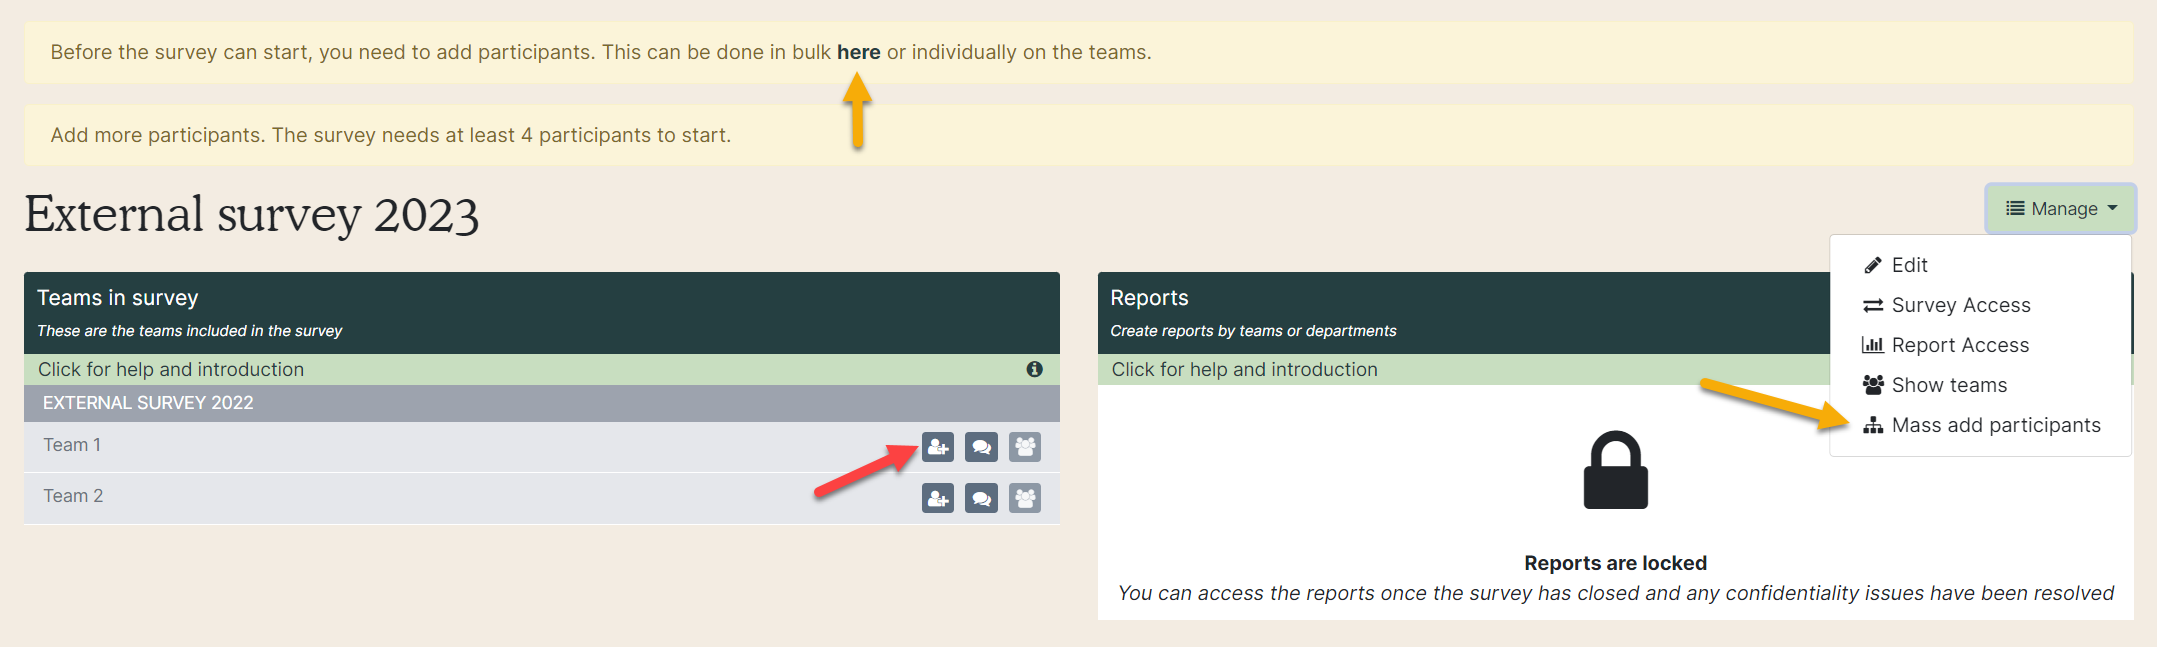
11: Add participants
You can add participants in two ways: By Excel or manually.
- By Excel: Add all the participants at once. Click on the link in the yellow bar at the top or under Manage (yellow arrows).
- Manually: Click on the icon by each team (red arrow). Then you can write their names and e-mails.
12: By Excel
Follow these steps to download the Excel for the external organisation.
- Click on 'Download'.
- Open the Excel and fill out the participants’ names and e-mails. If you have several teams, there are more tabs at the bottom of the Excel, if you have several teams. Save the file.
- Click ”Choose file” to find the Excel on your computer.
- When the file is selected, click 'Upload'.
The system is now loading the employees in the system. You will receive an e-mail when it's done.
Yellow arrow: Click on ”Help” to see a short video of how to do it.

In order to complete the survey, a minimum of 4 participants must be added.
13: Edit participants
The questionnaire is automatically sent out to the participants on the selected start date. Until the start date, you can edit who will receive the survey.
- Yellow arrow: Click on the team icon to unfold the team.
- Green arrow: Remove individual participants by clicking on the bin.
- Purple arrow: Add more participants manually by clicking on the plus icon.

Until the start date, participants can be added or removed from the survey.
After the start date, participants can be added, but not removed.
14: Manage - before the start date
Under "Manage" (top right) there are the following options, before the survey is sent out.
Gray arrow: Edit the setup of the survey, e.g. the start date.
- Blue arrow: Give a colleague full access to administer the survey and see the answers (see point no. 15). This is not possible to change after the start date when the survey is sent out.
- Pink arrow: Give a colleague access to the statistics reports (see point no. 15).
- Yellow arrow: See the overview of teams in the survey.

15: Give access
Give a colleague access to the answers or statistics reports.
- Select 'Survey Access" or 'Report Access' under Manage
- Find the person (1) and click 'Grant access' (2).
- Green arrow: See who has the access to the survey.


16: Track the survey
When the survey has started, you can get an overview of how many have responded.
- Red arrow: See how many have responded in each team.
- Green arrow: Edit survey. It is possible to see the setup of the survey, but not change it.
- Blue arrow: See who has access to the survey. This can't be changed.
- Pink arrow: Give a colleague access to the statistics reports.
- Yellow arrow: See the overview of teams in the survey.
- Gray arrow: Send reminders to those, who have not answered yet.
- Purple arrow: Close the survey (see point no 17). When it is closed, it's not possible for participants to respond.

17: Stop receiving answers
You have to close the survey in order to generate the reports.
Click on ’Manage’ (red arrow) and click on ’Stop answer gathering’ (green arrow).
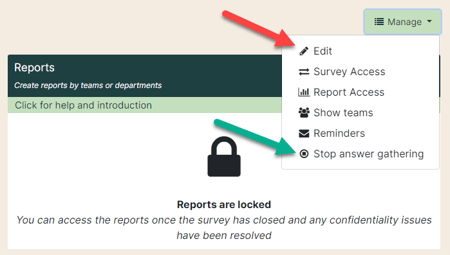
Tick the box 'Yes! I want to stop answer gathering!' (1) and click on 'Stop answer gathering' (2).

18: Merge teams
When you have stopped answer gathering, you need to look at the anonymity. Teams with the warning sign is with less than four participants who have answered (green arrow).
These teams must be merged with another team to have minimum four answers (red arrow).

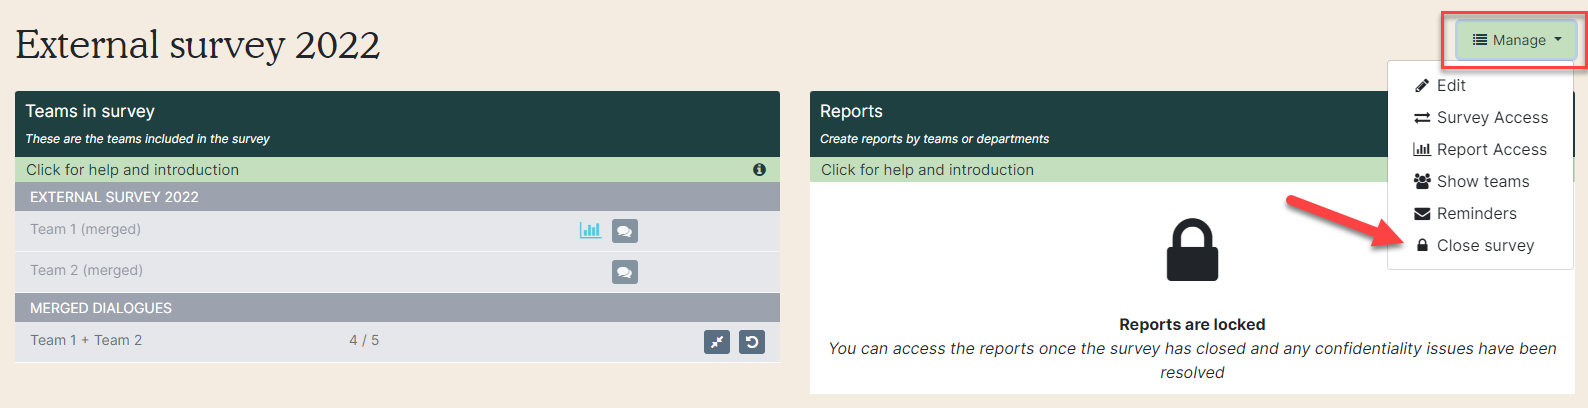
19: Close survey
When all teams have a minimum of 4 answers, you can close the survey.
Click on ”Manage” and select ”Close survey” (red arrow).
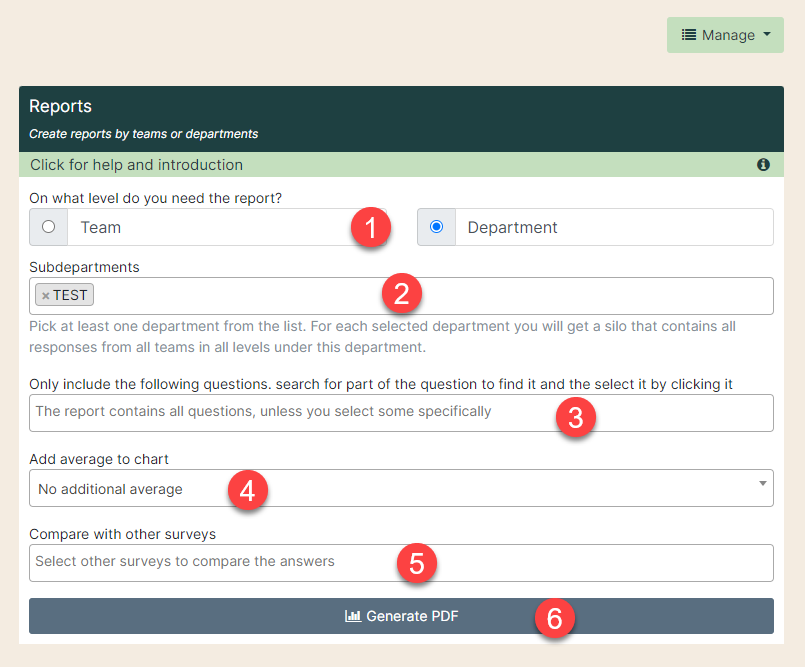
20: Generate reports
When all the anonymity issues have been taken care of and the survey is closed, reports can be generated.- Select if you want to generate a report for department(s) or team(s).
- Select the specific department(s) or team(s).
- Decide if you want the report based on specific questions. If none is selected, you will receive a report of all the questions in the used questionnaire.
- Decide if you want an average. Decide between none, automatic or manual average.
- Compare with other surveys.
- Generate the PDF.
22: The report shows the average in a graph.
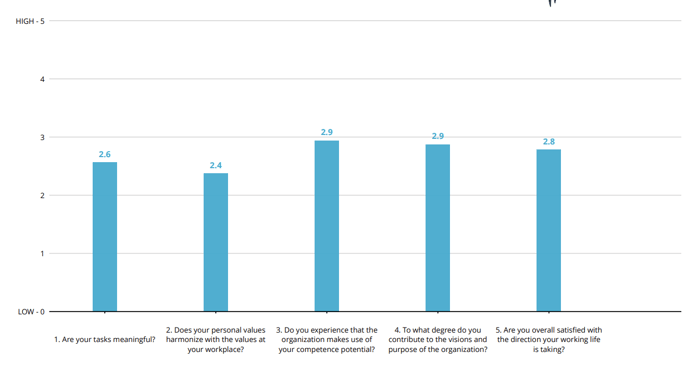
At the end of the report, there is a distribution of how the participants have answered and how many did not answer.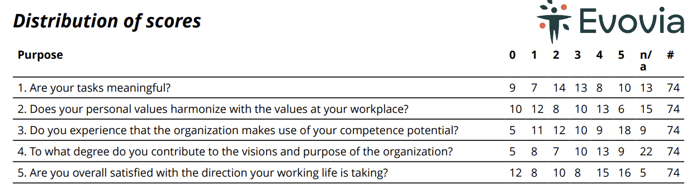
If you have the delegation to read the comments from the survey, they can be downloaded as an excel file. Read more here - Export survey comments .