In the EDP tool, you can send out questionnaires to your employees, which they can answer before the EDP interview. During the interview, you can write minutes and make appointments based on the employee's answers, and subsequently you can see statistics for the answers in your teams and departments.
1. When you open the EDP tool, you have the following options:
- Red arrow: The teams you can have EDP conversations with.
- Blue arrow: Search for archieved dialogues.
- Yellow arrow: Via the green ‘Manage’ button you can download team data as Excel (see the guide ‘Extract EDP data’).
- Green arrow: Via the green ‘Manage’ button you can see your appointments (see the guide ‘Overall overview of concluded EDP agreements’).
- Pink arrow: Process statistic: Via the green “Manage button” you can see how many EDP’s a manager has had in their team and how many minutes are written (see the guide Process statistics for EDP).
- Purple arrow: Via the green ‘Manage’ button you can get an overview of your competency initiatives (see the guide ‘Overview of competency initiatives’).
- Red dotted arrow: If you are responsible for departments (levels above individual teams), you will also get a department overview, where you can see years and statistics for EDP rounds made in the various teams in the departments.

2. Next to your teams, you can go directly to the main organization if, for example, you need to remove or add employees to the team (red arrow).

How to start a dialogue
1. Click on the team you want to have a dialogue with by clicking on the team name (red arrow) or the speech bubble (yellow arrow).

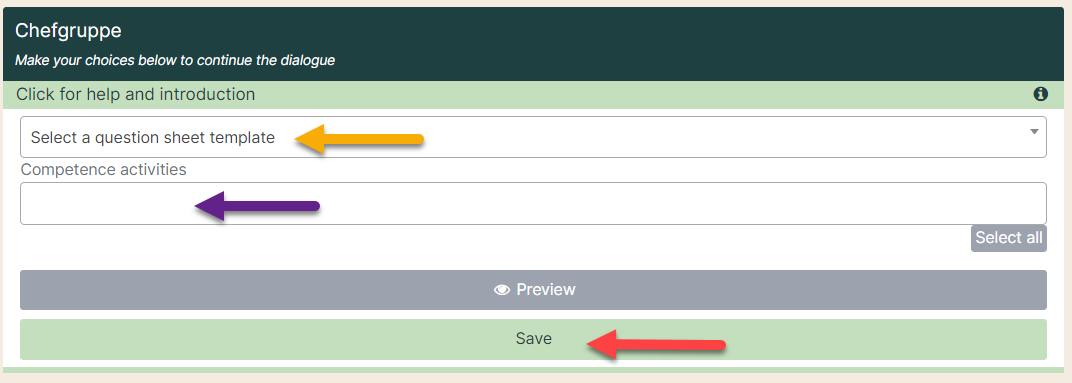
2. You will then be asked to select a question sheet (yellow arrow). When your organization was created, a question sheet was uploaded. If you want to make a new one or change the existing one, you can read more in our general guide to question sheets. If you want to see an example of the question sheet before you decide, you can click on 'Example' (the gray button).
If your organization has chosen that you can add lists for competency initiatives, an extra box will appear (purple arrow - see how to make lists for competency initiatives in the guide ‘Competence initiatives - setup’).
Create by clicking on 'Save' (red arrow).
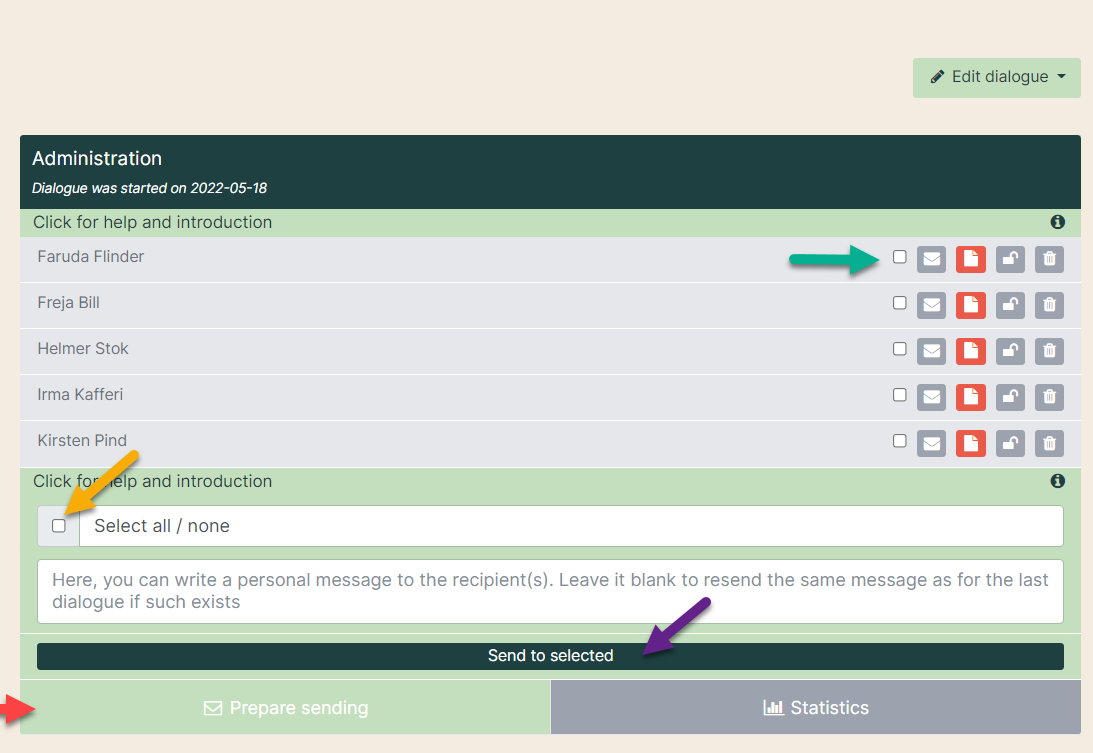
3. Now you have to prepare for the send out. Click on the box 'Send options' (red arrow). When you click on it, it unfolds and turns green as in the image below.
You can choose to send to all employees in the team (yellow arrow). It is also possible to send to individual employees. Then you just tick the little box off next to their name (green arrow).
In the white box you can write a personal message to the employee. This message will be included in the standard email. See what the email looks like in the guide ‘What does the email sent to the employee look like?’.
When you have filled in everything, click on 'Send to selected' (purple arrow).
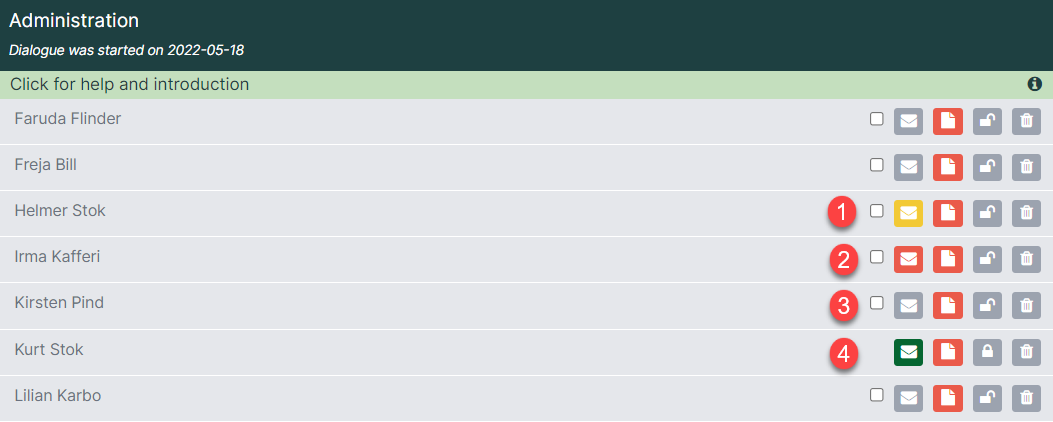
4. The envelope color shows how far the employee is with the answer.
- Yellow envelope: The sheet has been opened but not completed / sent
- Red envelope: The sheet is not open
- Gray envelope: No sheet has been sent
- Green envelope: The sheet has been completed and sent to the manager.
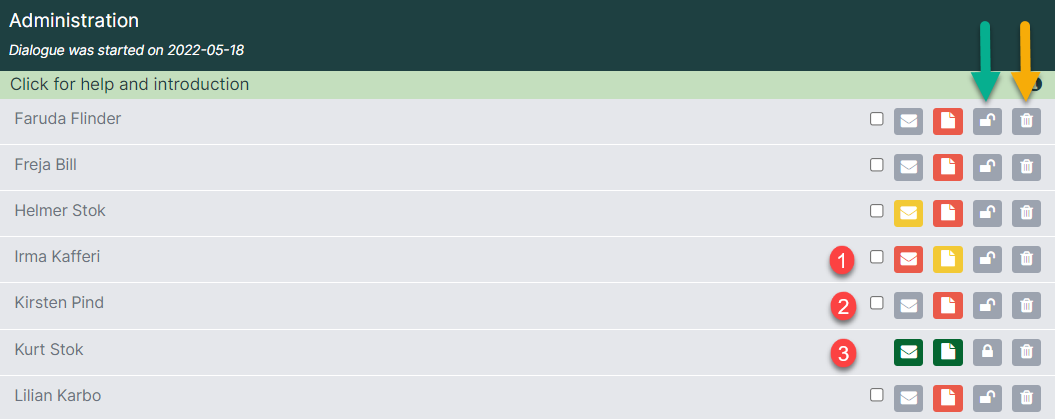
5. The color of the minutes shows the status of the manager.
- Yellow minutes: The minutes are open but not closed
- Red minutes: The minutes have not been opened yet
- Green minutes: The minutes are completed
The gray padlock (green arrow) shows whether the form has been handed in (locked) or not handed in (open). If the padlock is closed and the employee wants to correct his answer, the manager can unlock the form by clicking on the padlock. If you want to delete a dialog, click on the trash can (yellow arrow).

7. Once the employee has been added to the team, the envelope is gray because no mail has been sent out yet. If a questionnaire is to be sent out to the employee, click om the box and the email is prepared (see the step above).

8. If you remove an employee who has not yet completed his sheet, he will be removed. If the dialog is completed when the employee is deleted, the employee will still appear in the dialogue. If you want to delete her, click on the garbage can. The completed sheet is still included in the statistics, even if the employee has been deleted.

9. When you open a minute, you can see at the very top how far your employee is with filling out the question sheet (red arrow).

10. At the very top of the minute, you can see when you have changed the minutes. Click on manage and select ‘History’ (purple arrow). You can also download the minute (yellow arrow) or add previous score to the minute to compare (green arrow).

11. You can draw statistics on the EDP dialogs (red arrow).
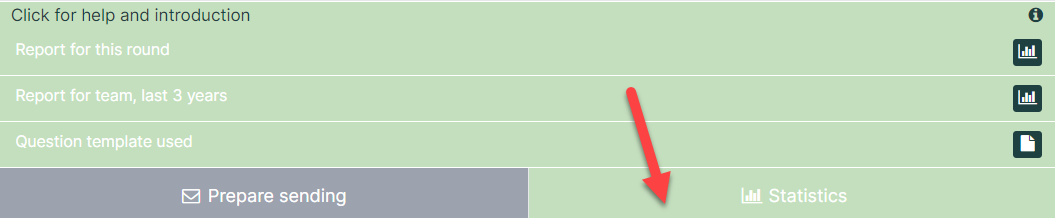
Read the guide 'Drawing EDP statistics'.