1. Open Ongoing 1-on-1
Open Ongoing 1-on-1 on the dashboard.
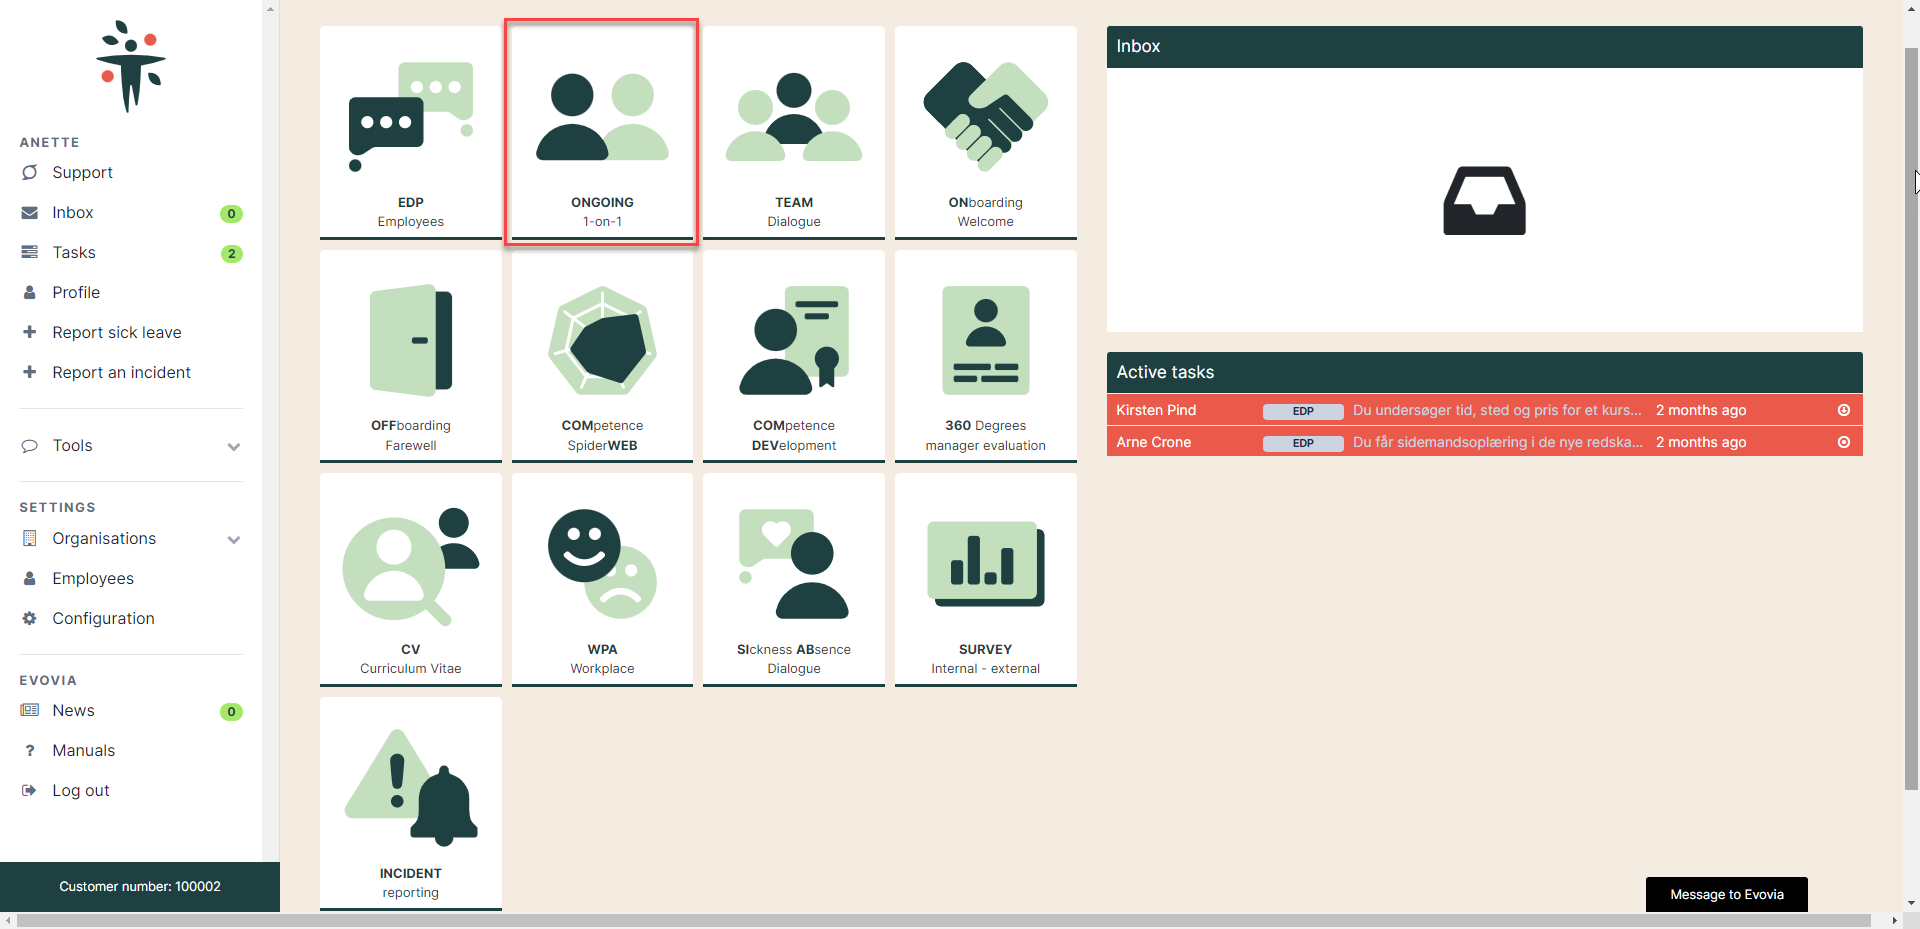
2. Overview of dialogues
In the overview of dialogues, you can see the teams and employees with whom you can have a 1:1 dialogue with.
Click on the blue tab by the team’s name to unfold the team (red arrow). If you have already started a dialogue with an employee, click on their name to go to the dialogue (yellow arrow).
Click on the plus icon by the employee’s name if you haven’t started a dialogue with the employee yet (green arrow).

Now you must decide upon which questionnaire to send. Click on the questionnaire (purple arrow), select a questionnaire and save (blue arrow).
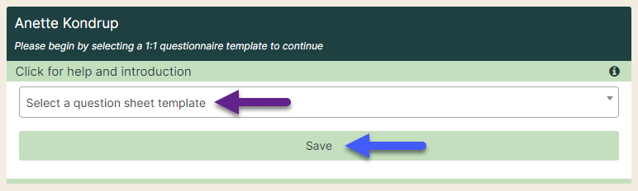
See how to create a questionnaire in the manual ”Manager: Copy an ongoing 1-on-1 questionnaire”.
3. Send the questionnaire to the employee
Now it’s time to send the questionnaire to the employee. Click on ”Prepare sending” and the box unfolds (red arrow). Tick off the box by the employee’s questionnaire (yellow arrow). In the white box you can write a message to the employee. When you have done all this, click on ”Send to selected” (purple arrow) and the employee receives an e-mail with the questionnaire to the ongoing 1-on-1.

The colors on the envelope show the status of the employee:
 Grey: Not yet sent to the employee
 Red: Sent to the employee
 Yellow: The employee has started answering their questionnaire
 Green: The employee has finished their questionnaire.
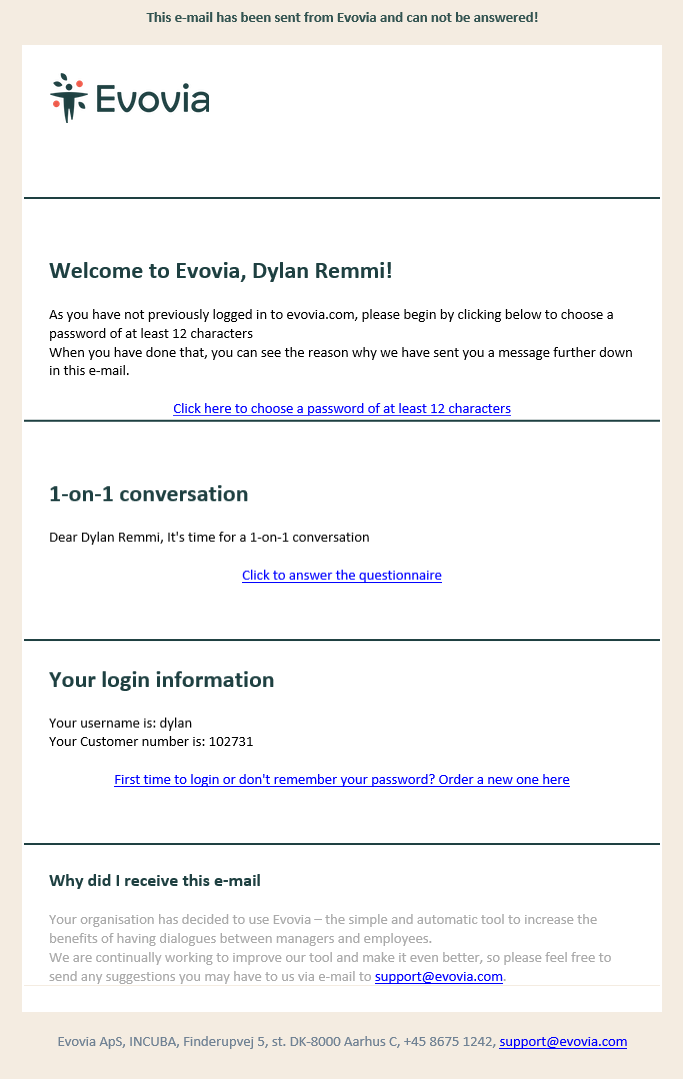
4. The e-mail to the employee
This is the e-mail sent to the employee.
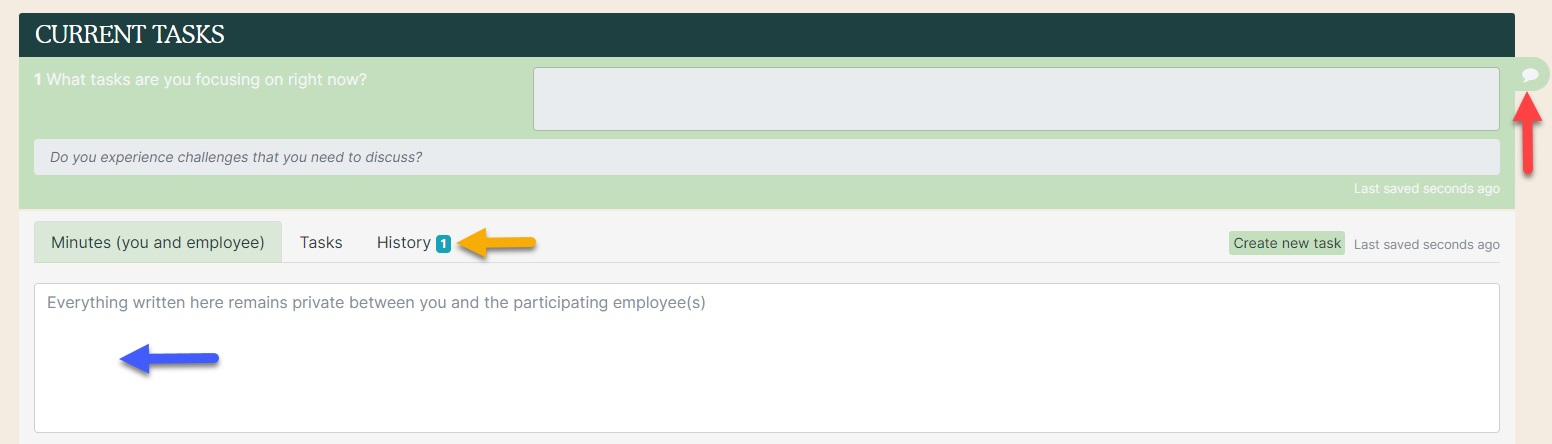
5. The minute
When the employee has finished their questionnaire, the answers are visible in the minute. You can open the minute (yellow arrow) at once and writ your notes.

Click on the speech bubble to unfold the question (red arrow) and write your notes/minutes in the text field (blue arrow).
Previous minutes from ongoing 1-on-1’s are visible on the tab ”History” (yellow arrow)
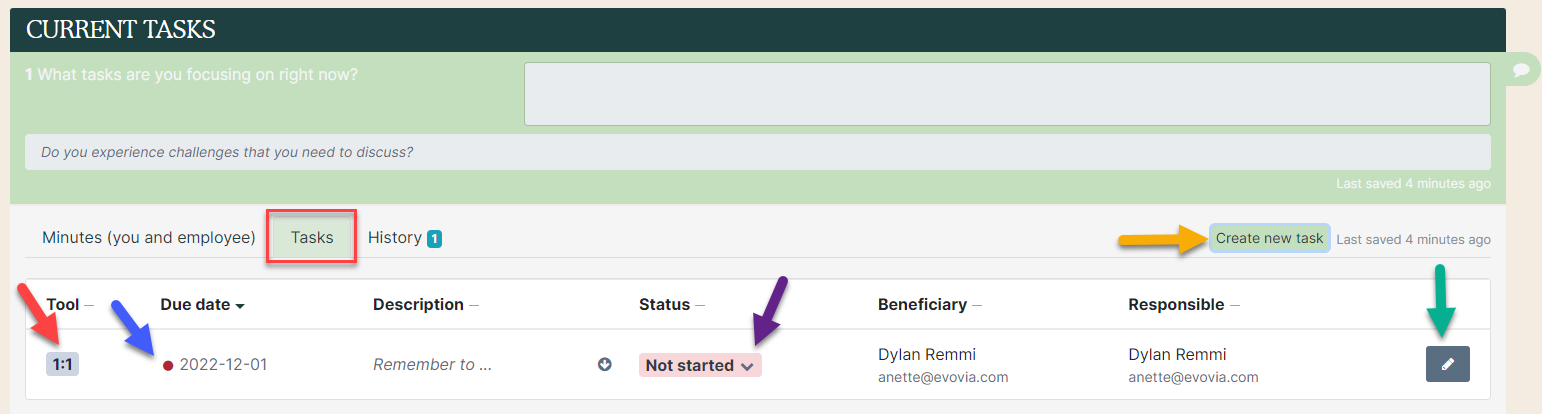
6. Tasks
Go to the tab ”Tasks” where you have these options:
- Red arrow: All tasks created for this question on the employee are shown. Unfinished tasks are also shown. New tasks will be visible at once here.
- Yellow arrow: Create a new task by filling out the fields. A reminder is sent on e-mail to the responsible for the task when the deadline is due.
- Green arrow: Edit task. See the manual on how to edit tasks.
- Purple arrow: Change the task’s status
- Blue arrow: Change the task’s deadline.
7. Finish the minute
The minute text is continuously saved while you are typing in the minute. Click “Close and send the answers” (red arrow) to send the minute to the employee.
The employee can now access the minute.
Managers can always open the minute and add to it even when it is closed and sent.

Find all minutes on an employee.
See the manual ”Find all your available 1:1 minutes”.