Standard Entra ID setup
⚠️ Before starting this guide, make sure you have your Evovia agreement number - it is a part of more URL's in the guide.
⚠️ This guide is for a pure SSO integration. Evovia also provides a Entra application that will sync users from Entra to Evovia - and setup SSO.
1) Log into your Azure account, and click Enterprise Applications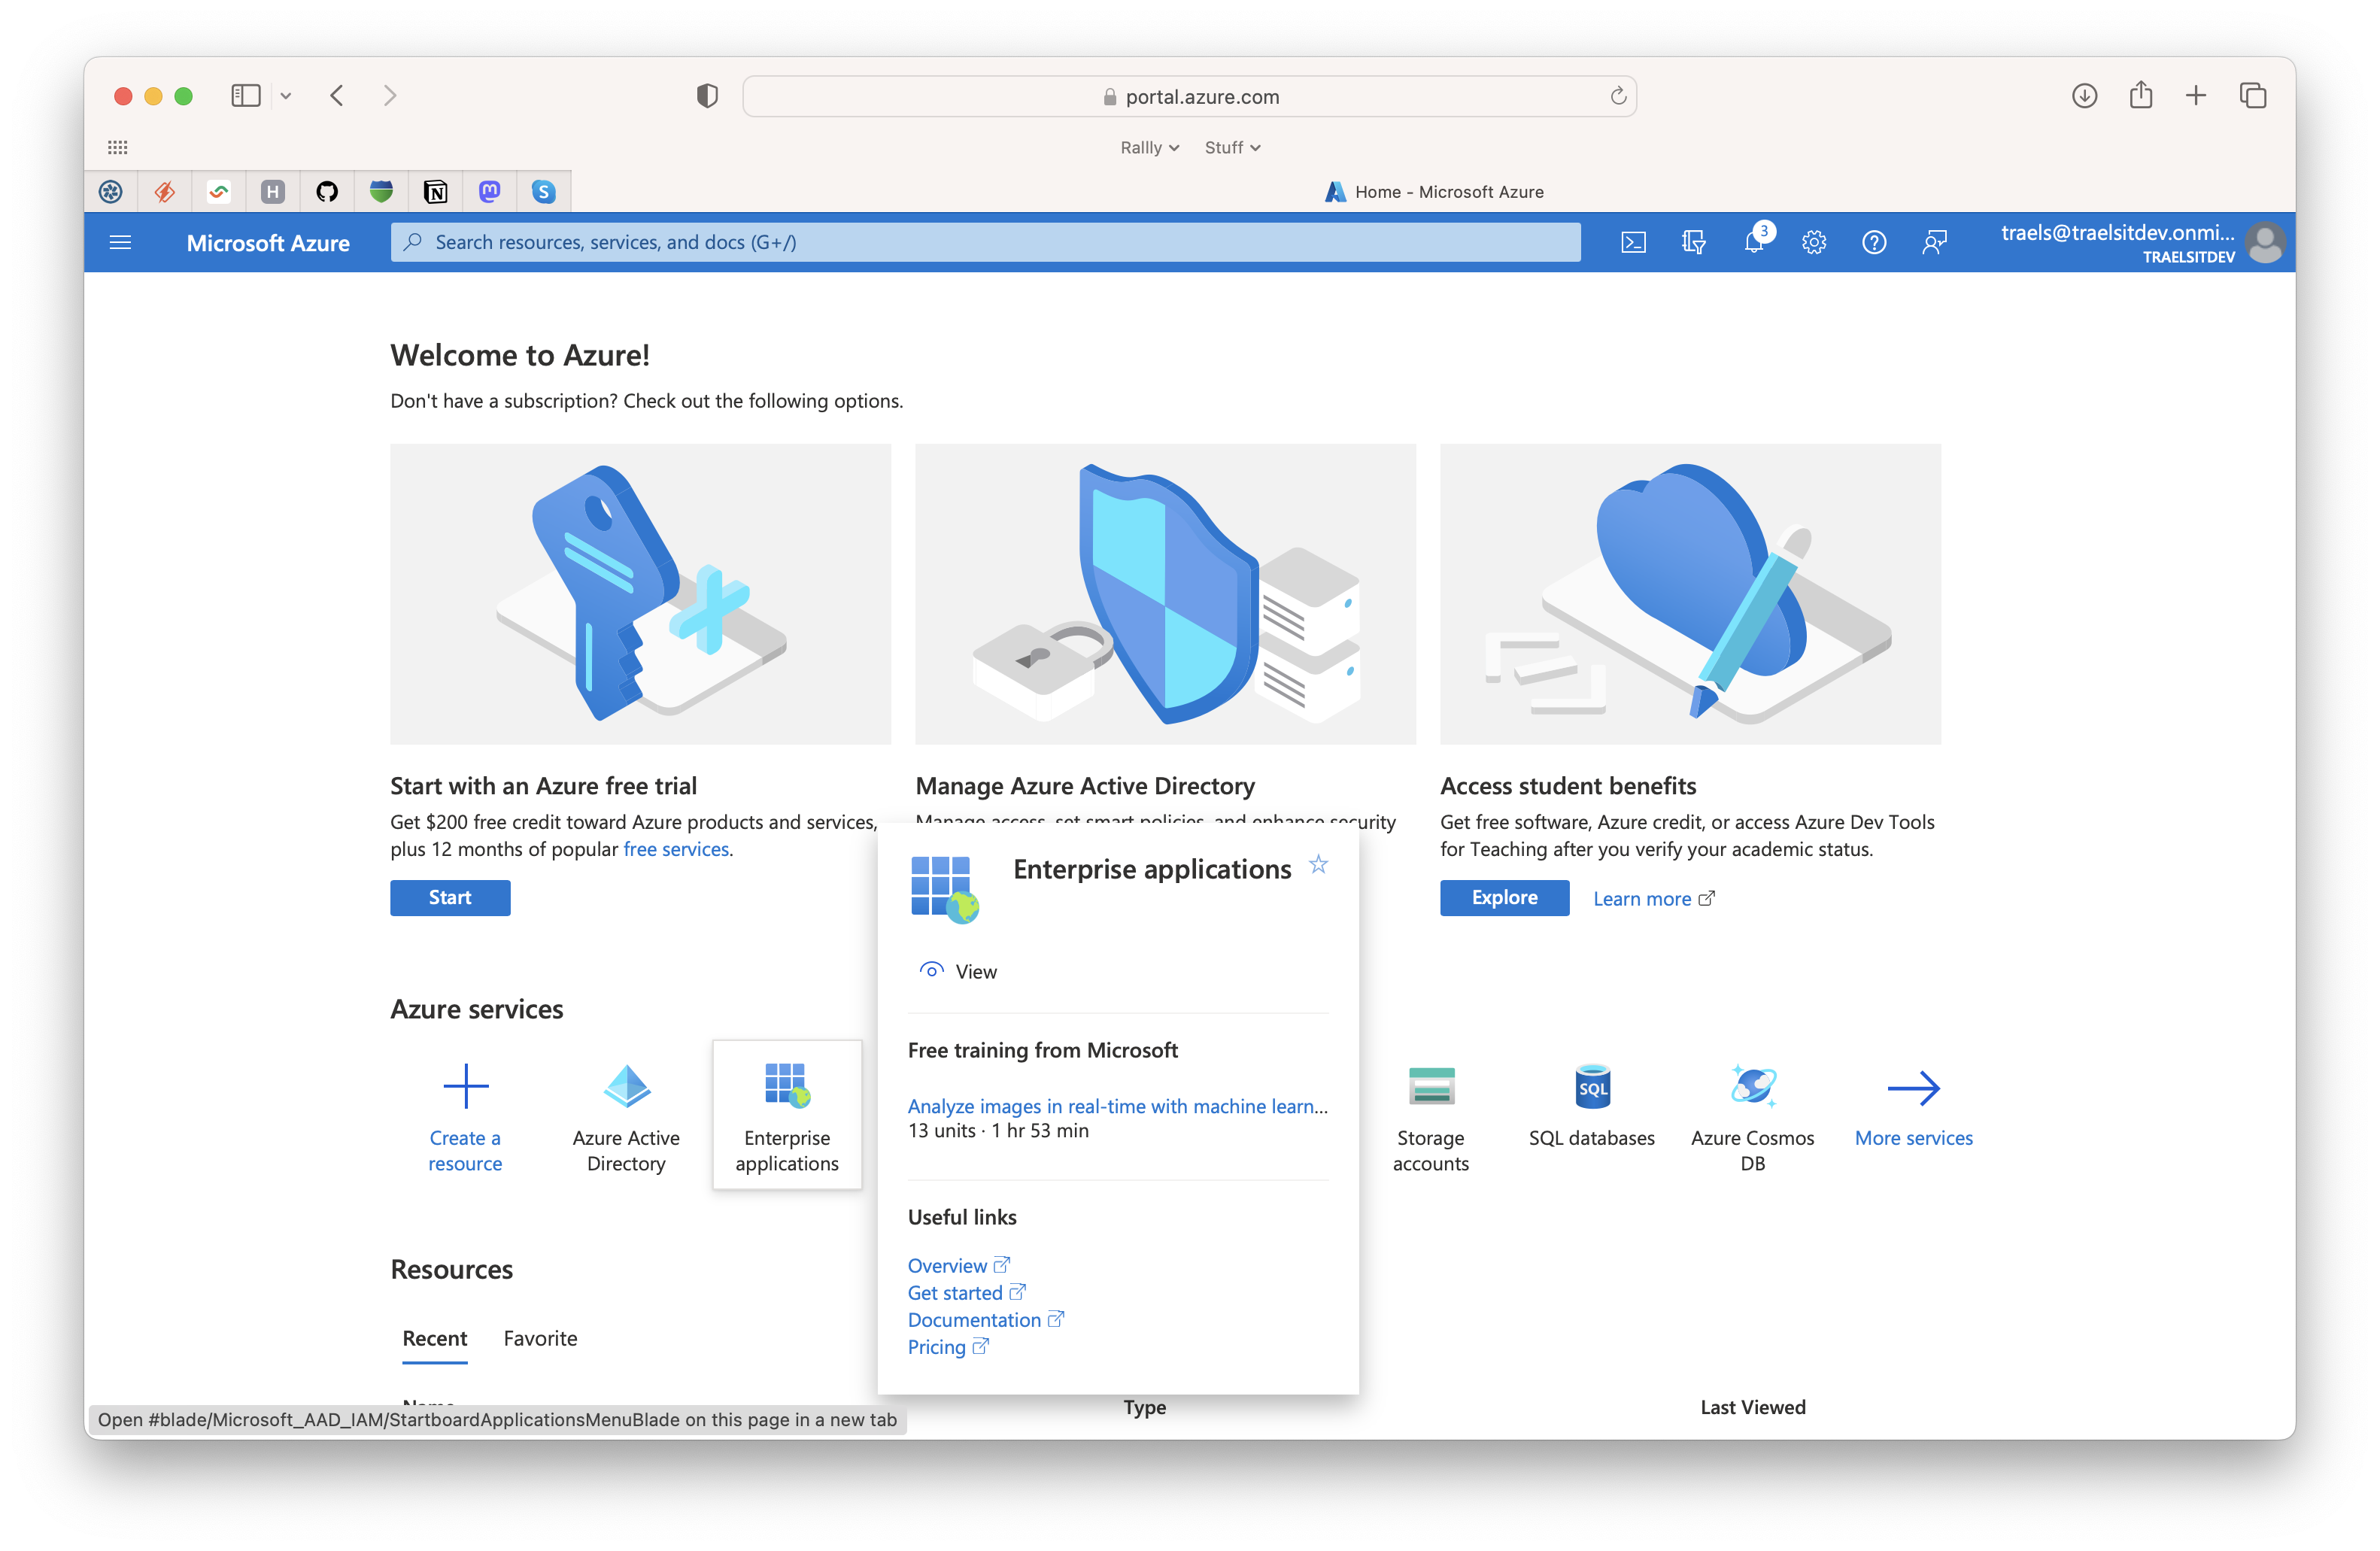
2) Click the + New application button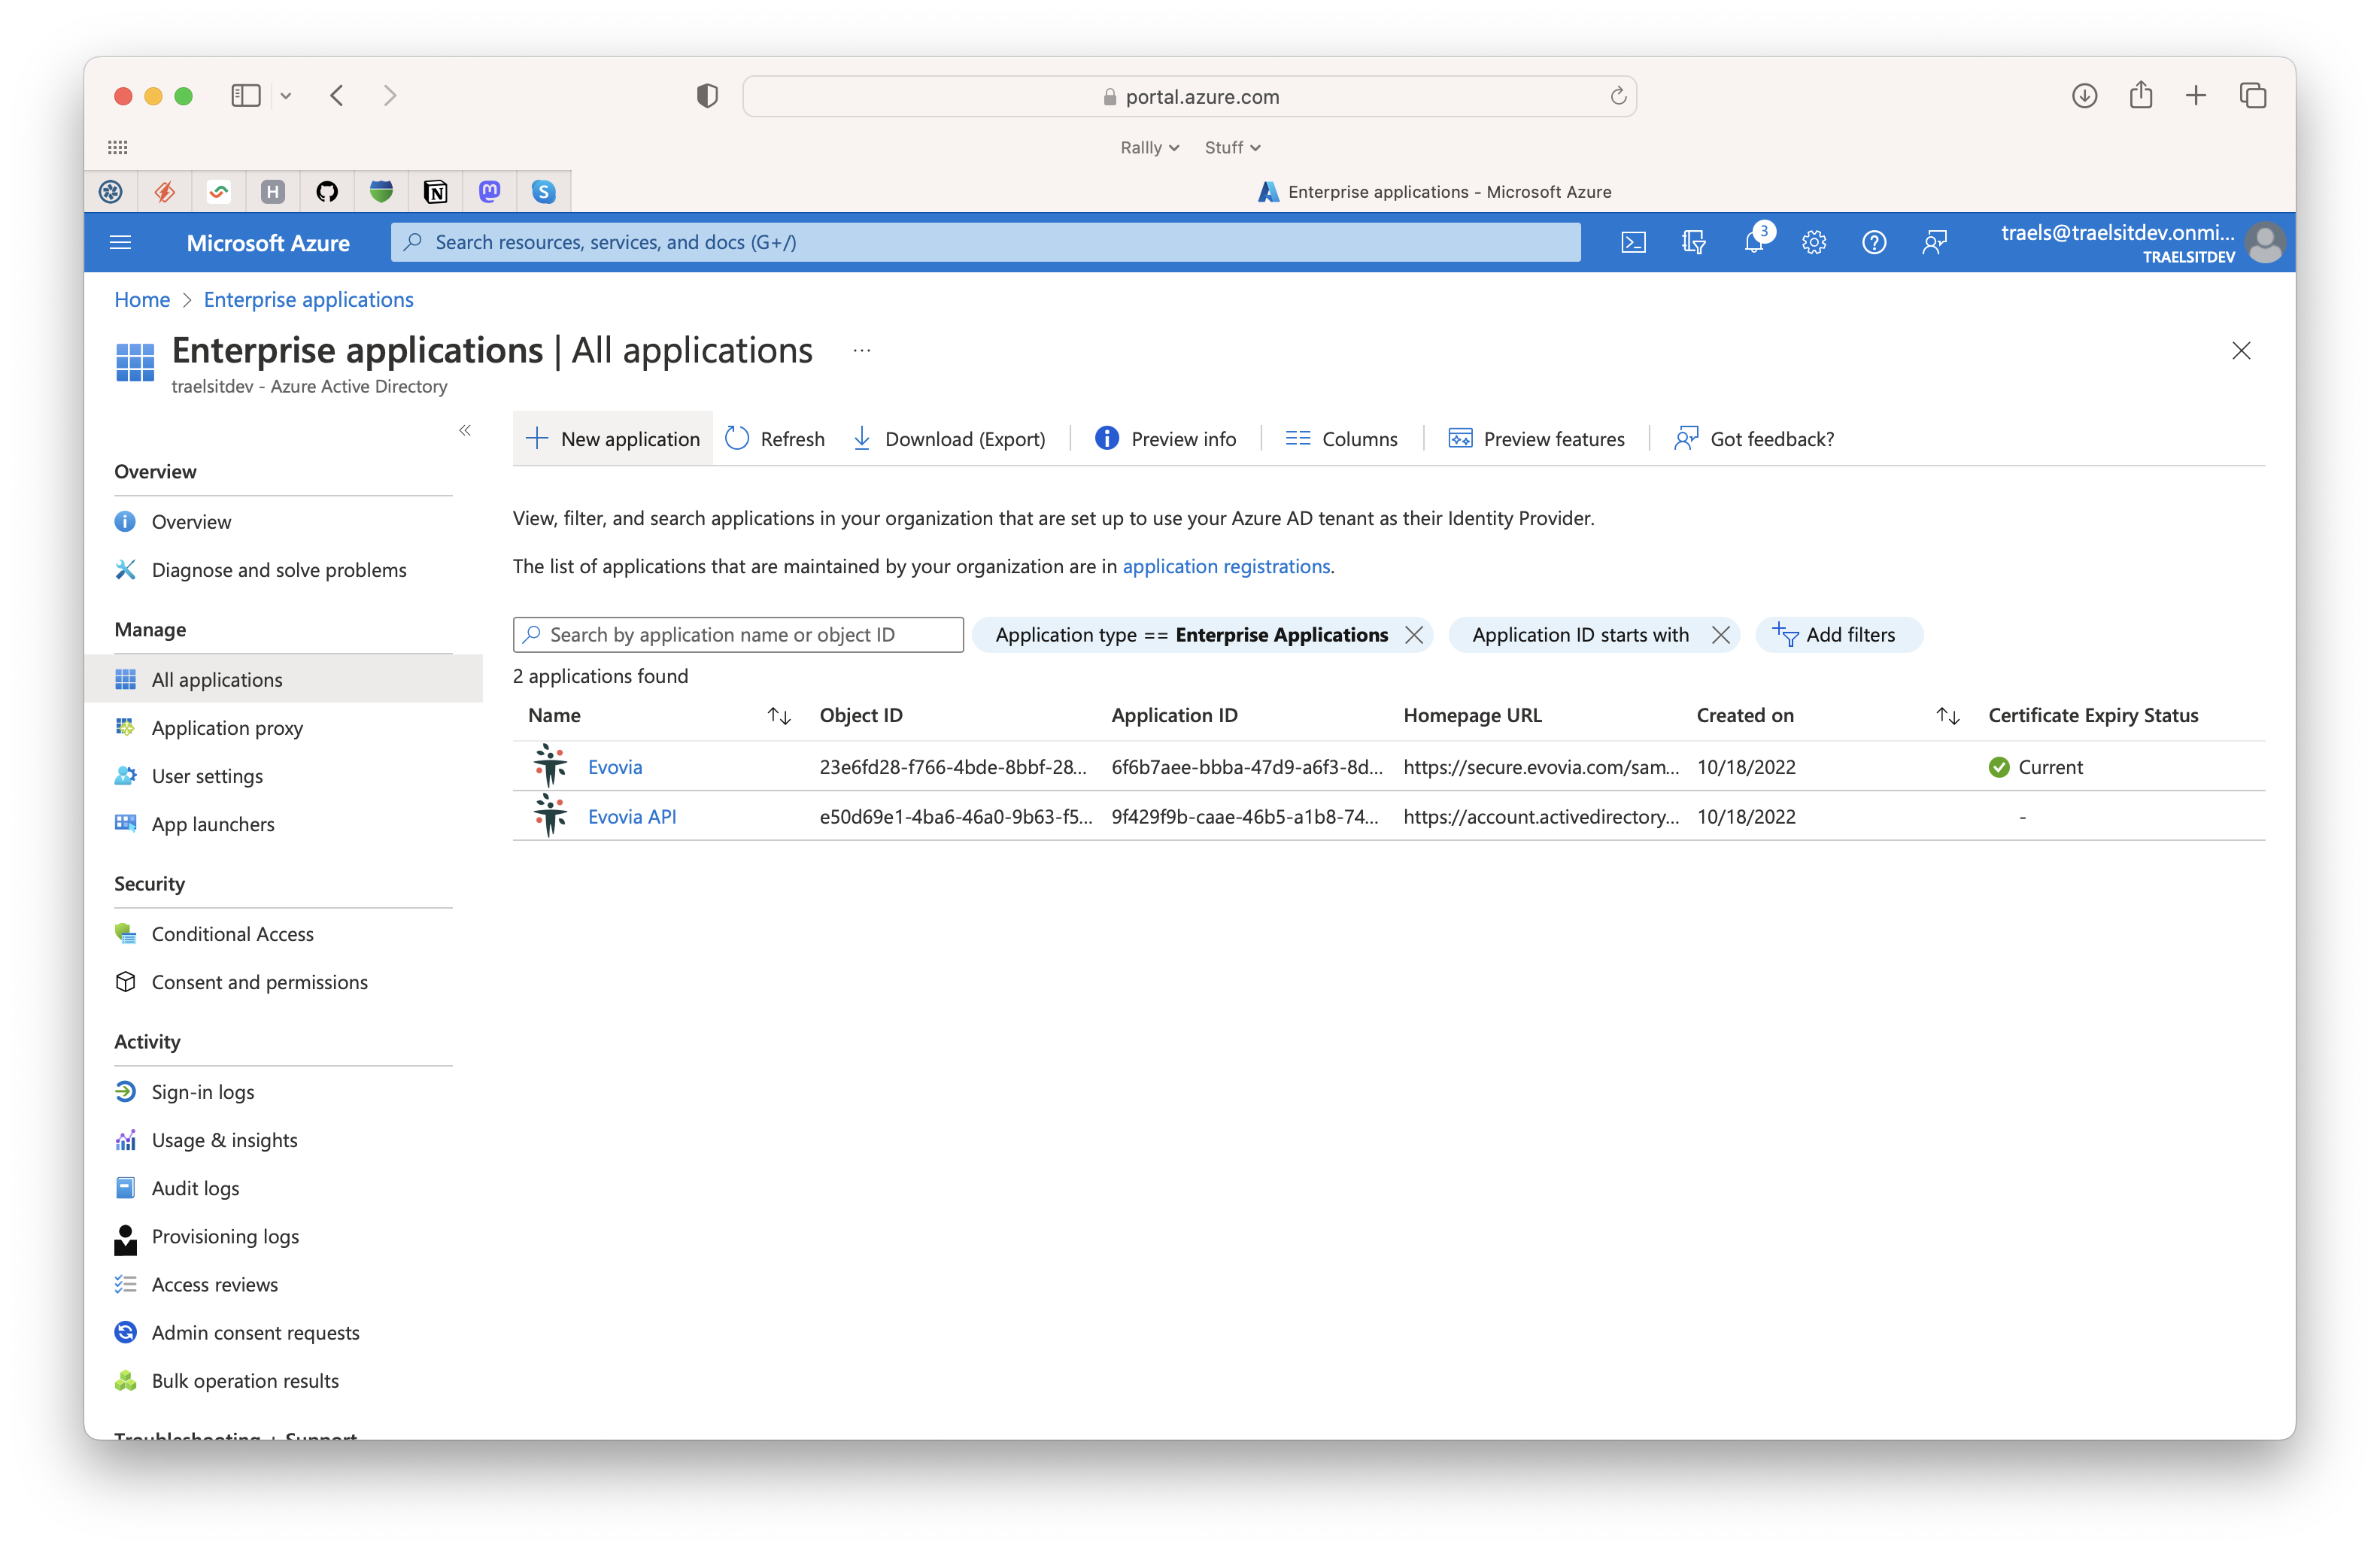
3) Click + Create your own application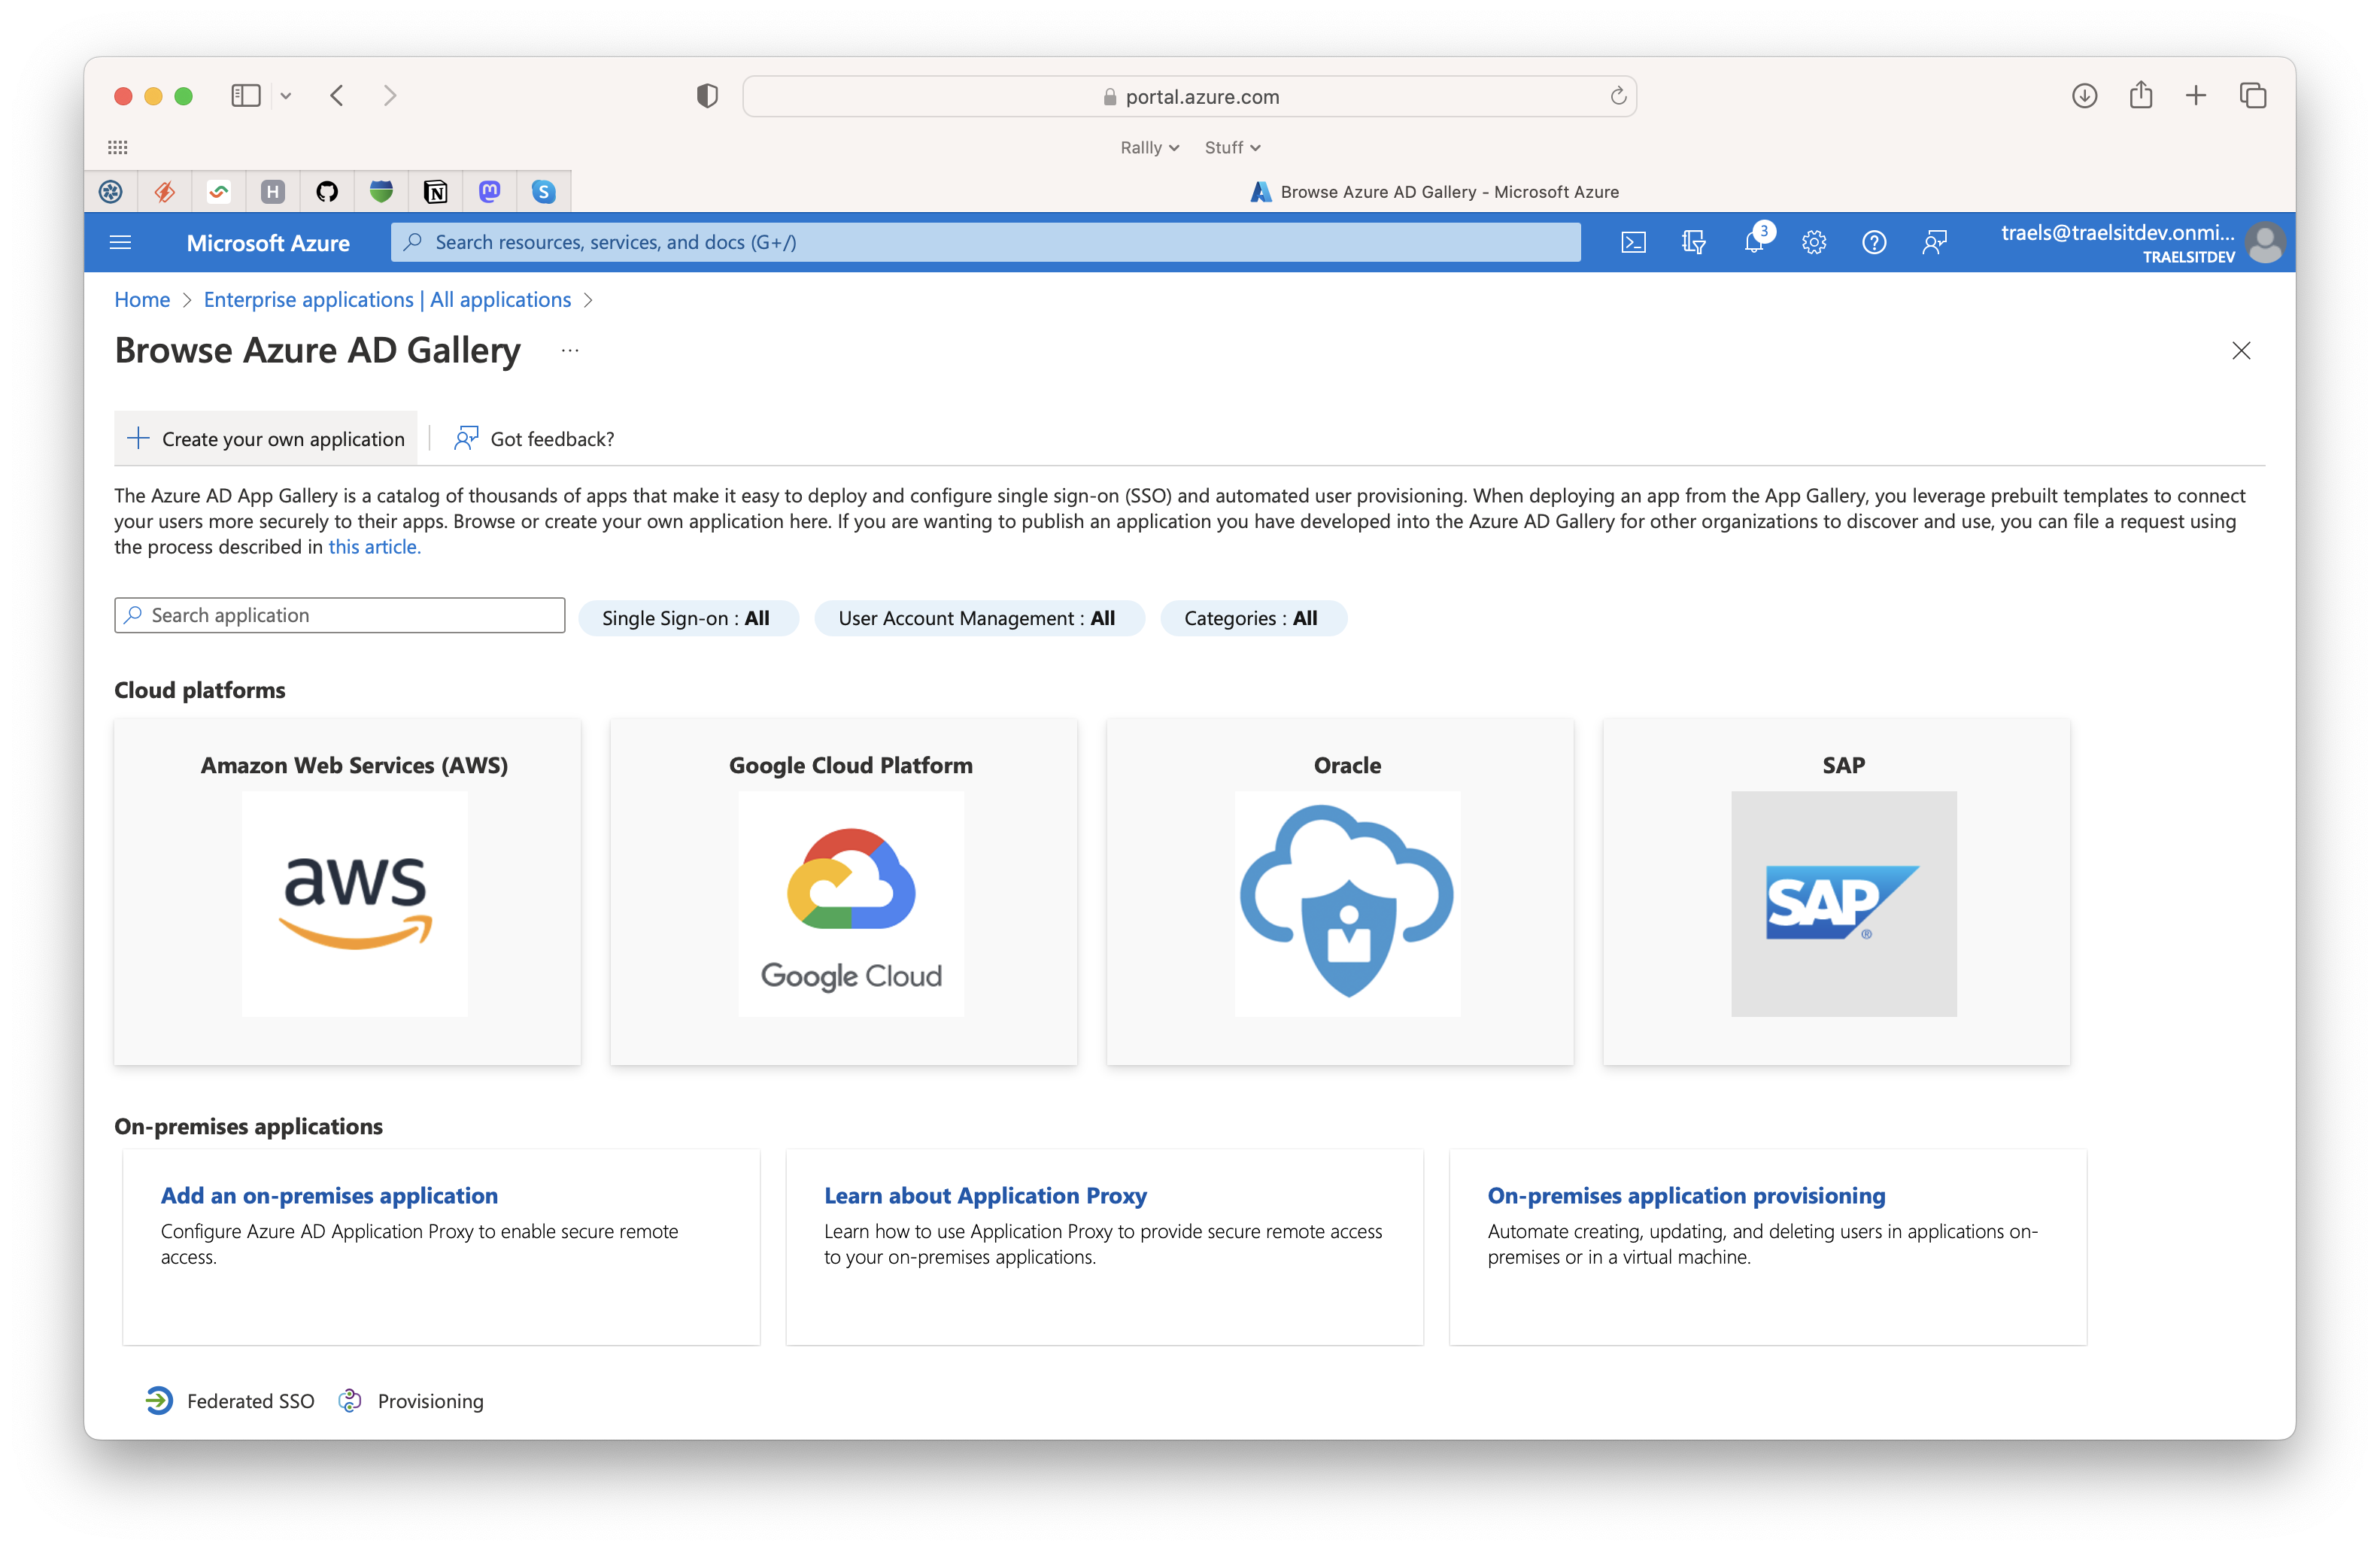
4) Give it a name. If you choose to name it something with Evovia, Azure will suggest our app. Do not choose that. Click Create and go fetch a cup of ☕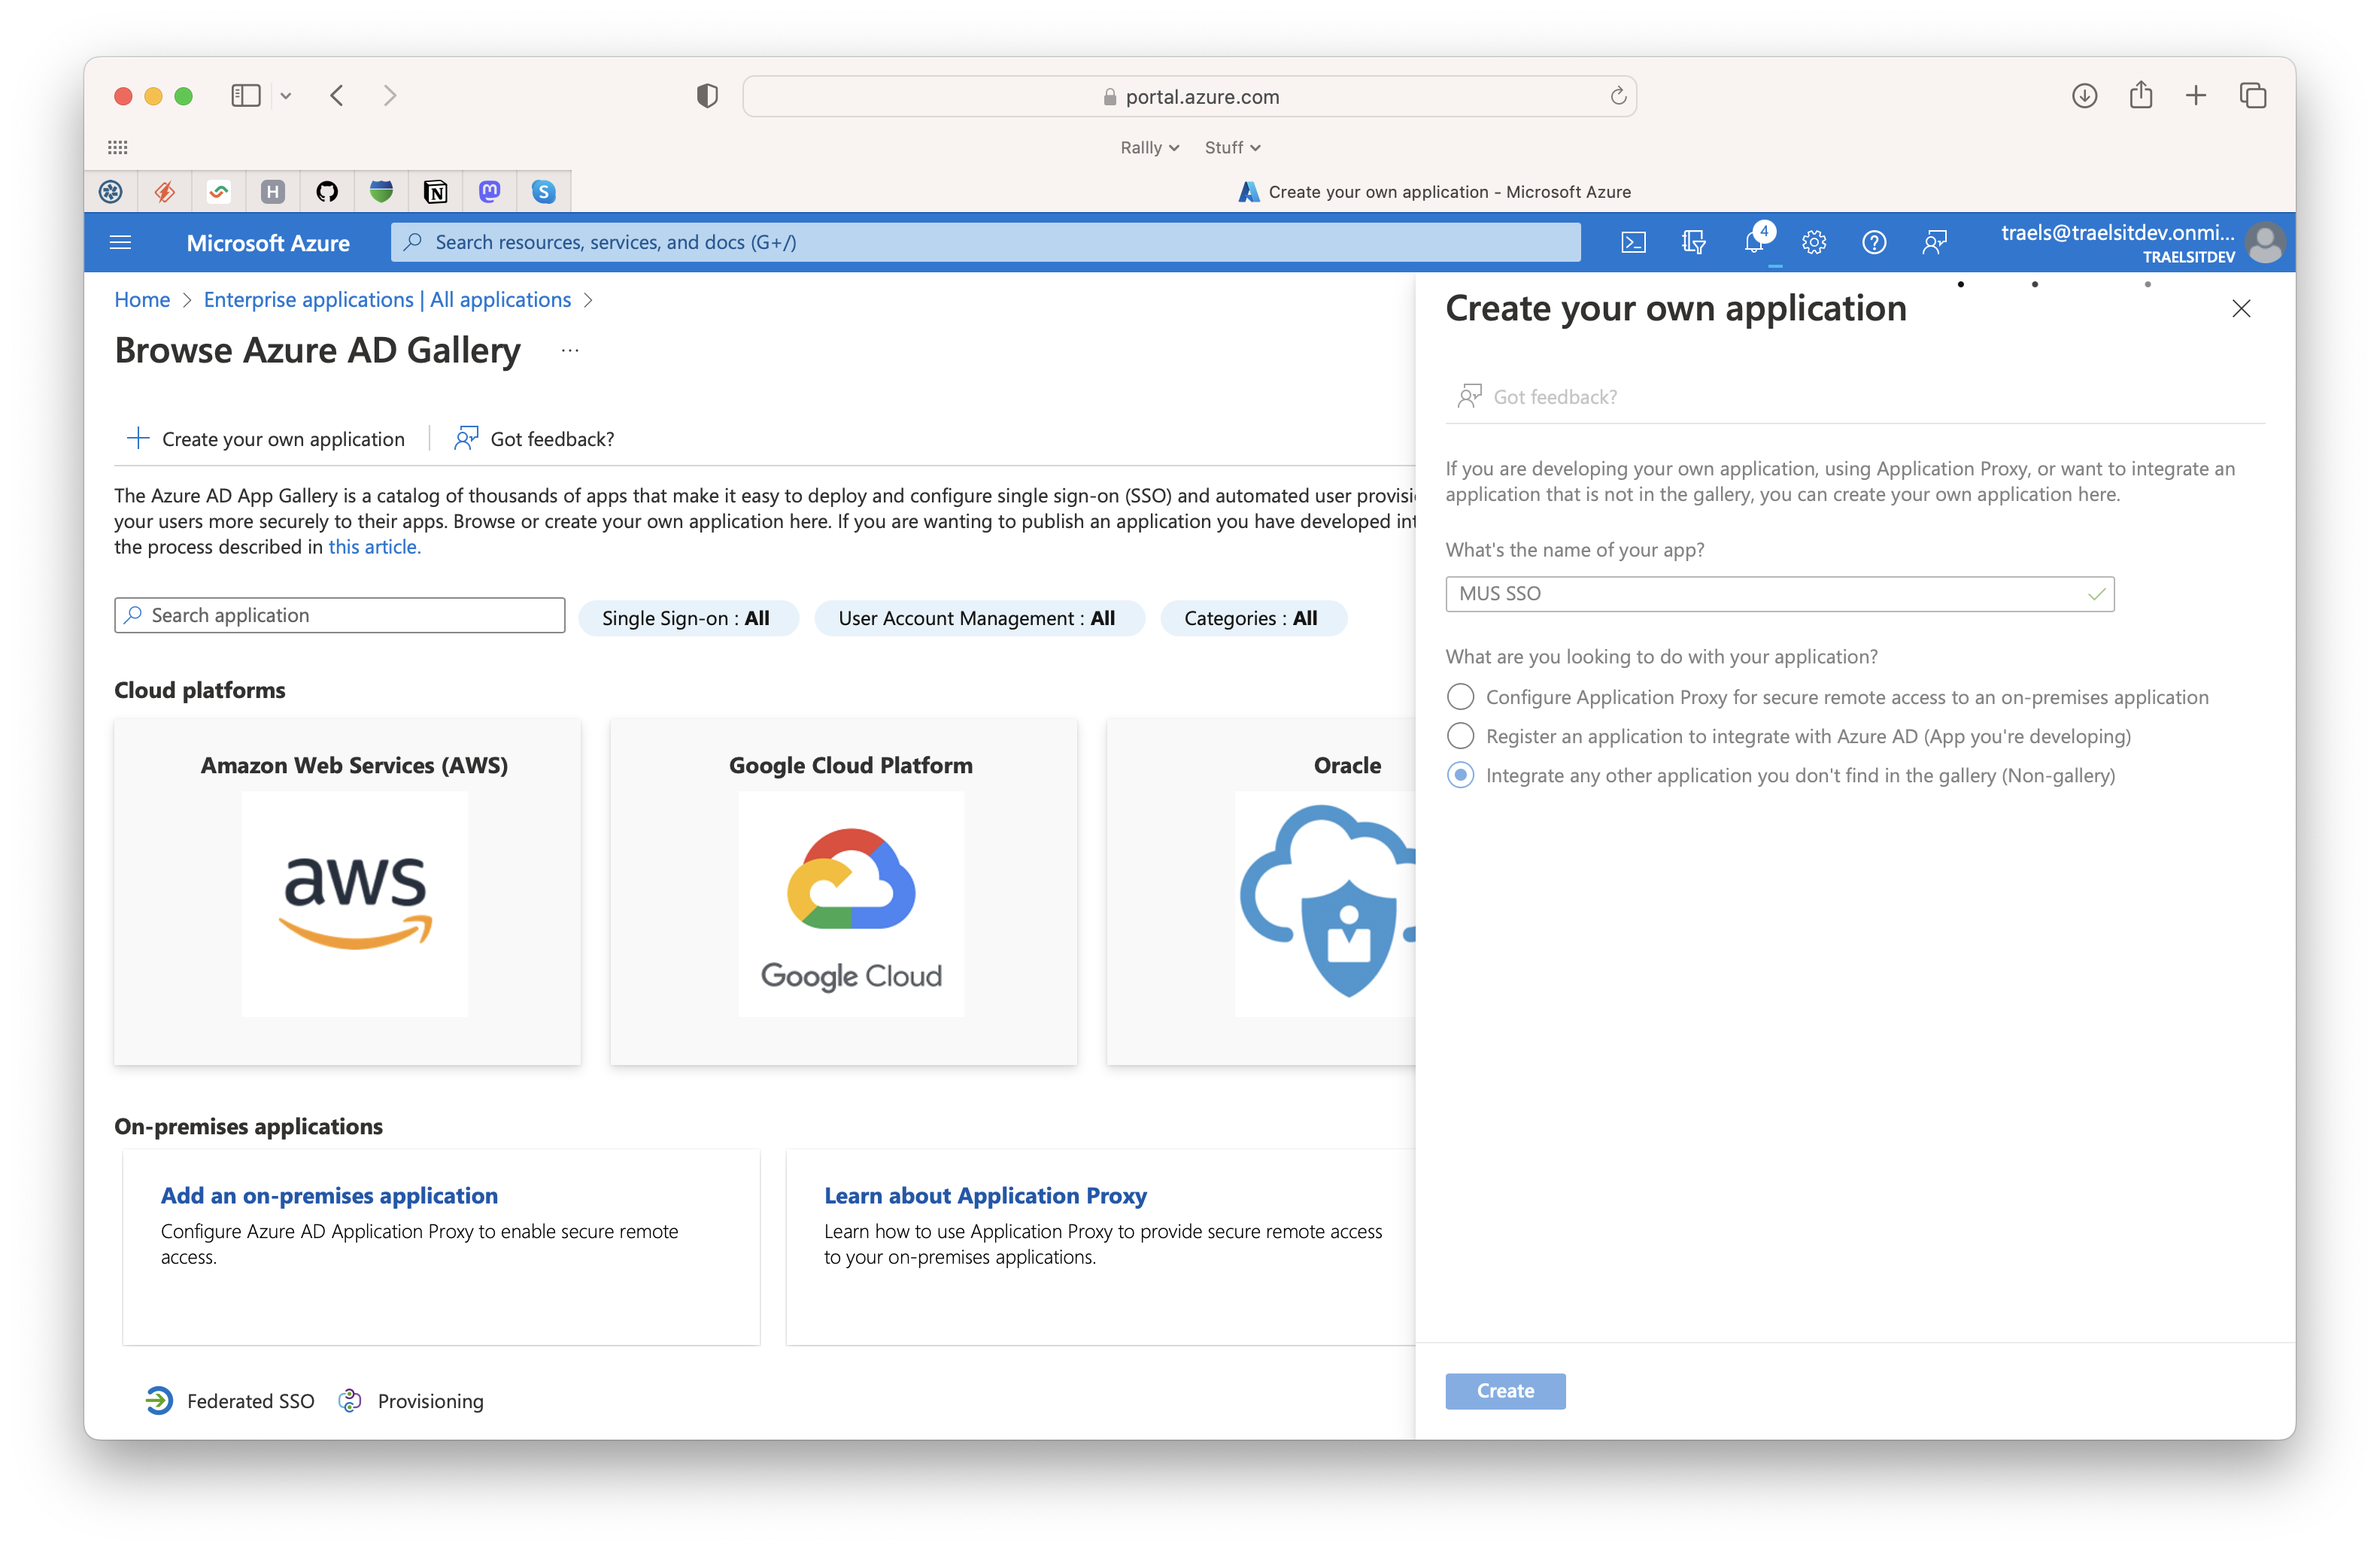
5) Click button 2. Set up single sign on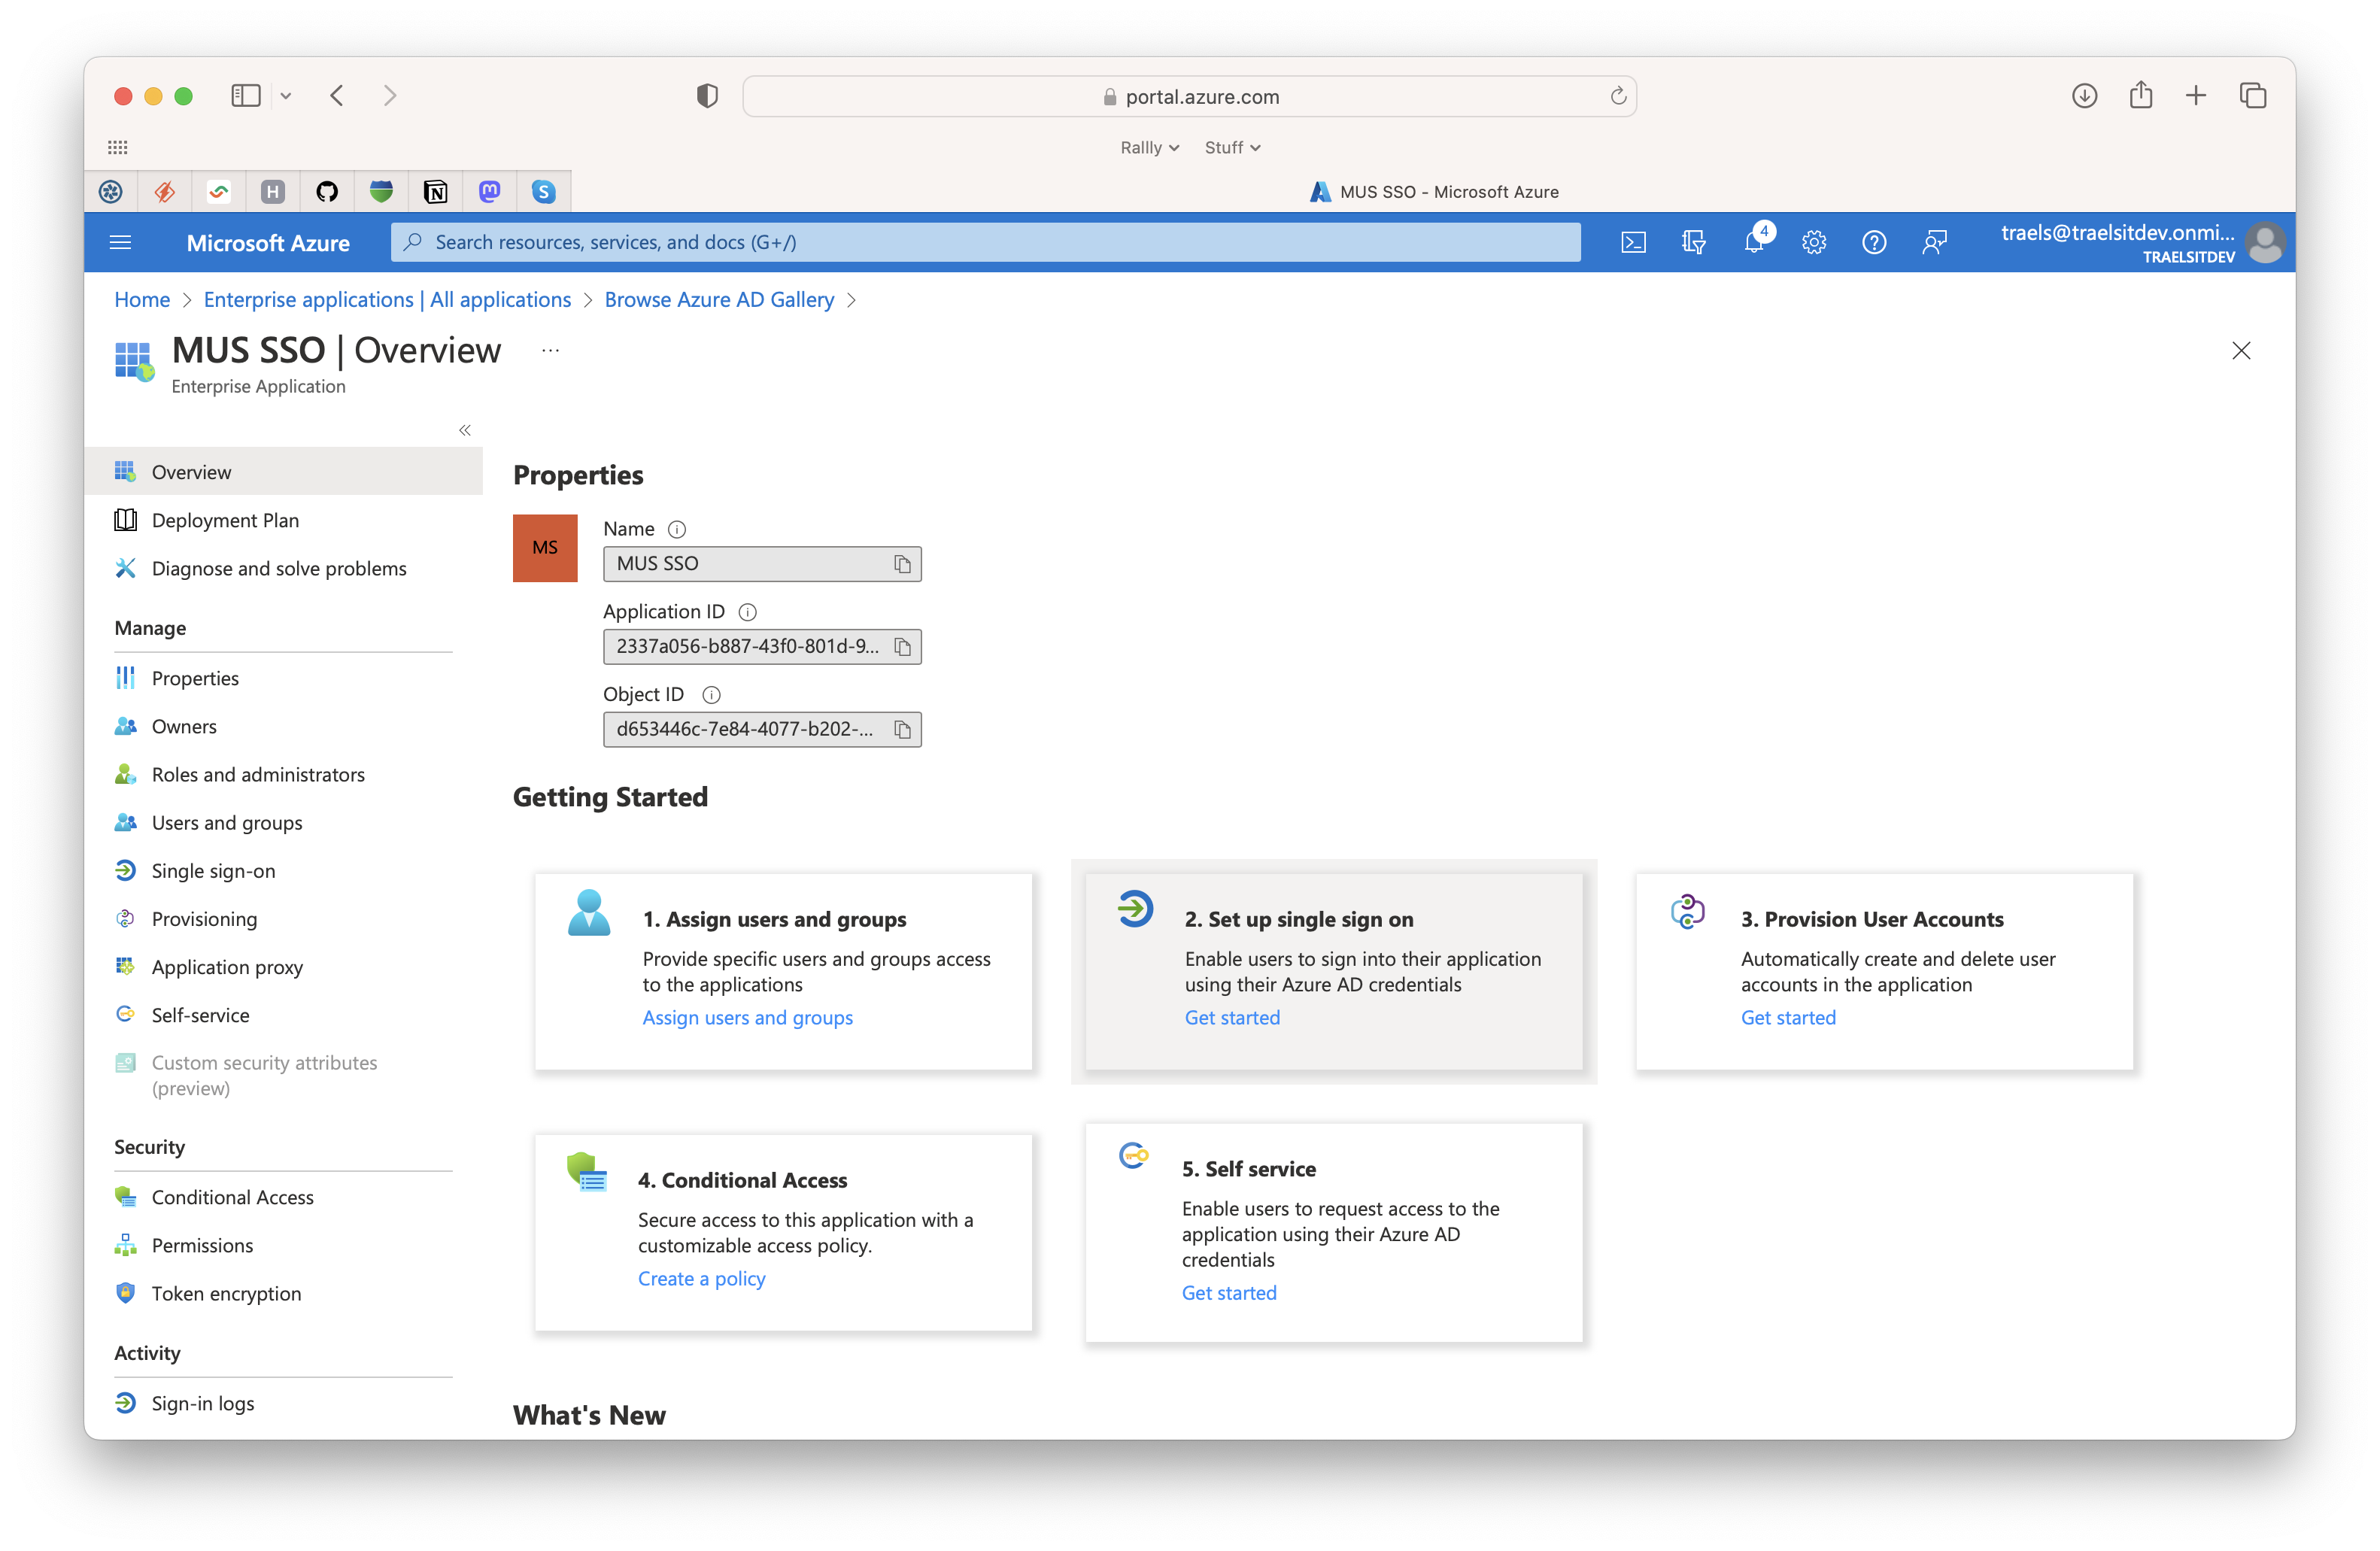
6) Click SAML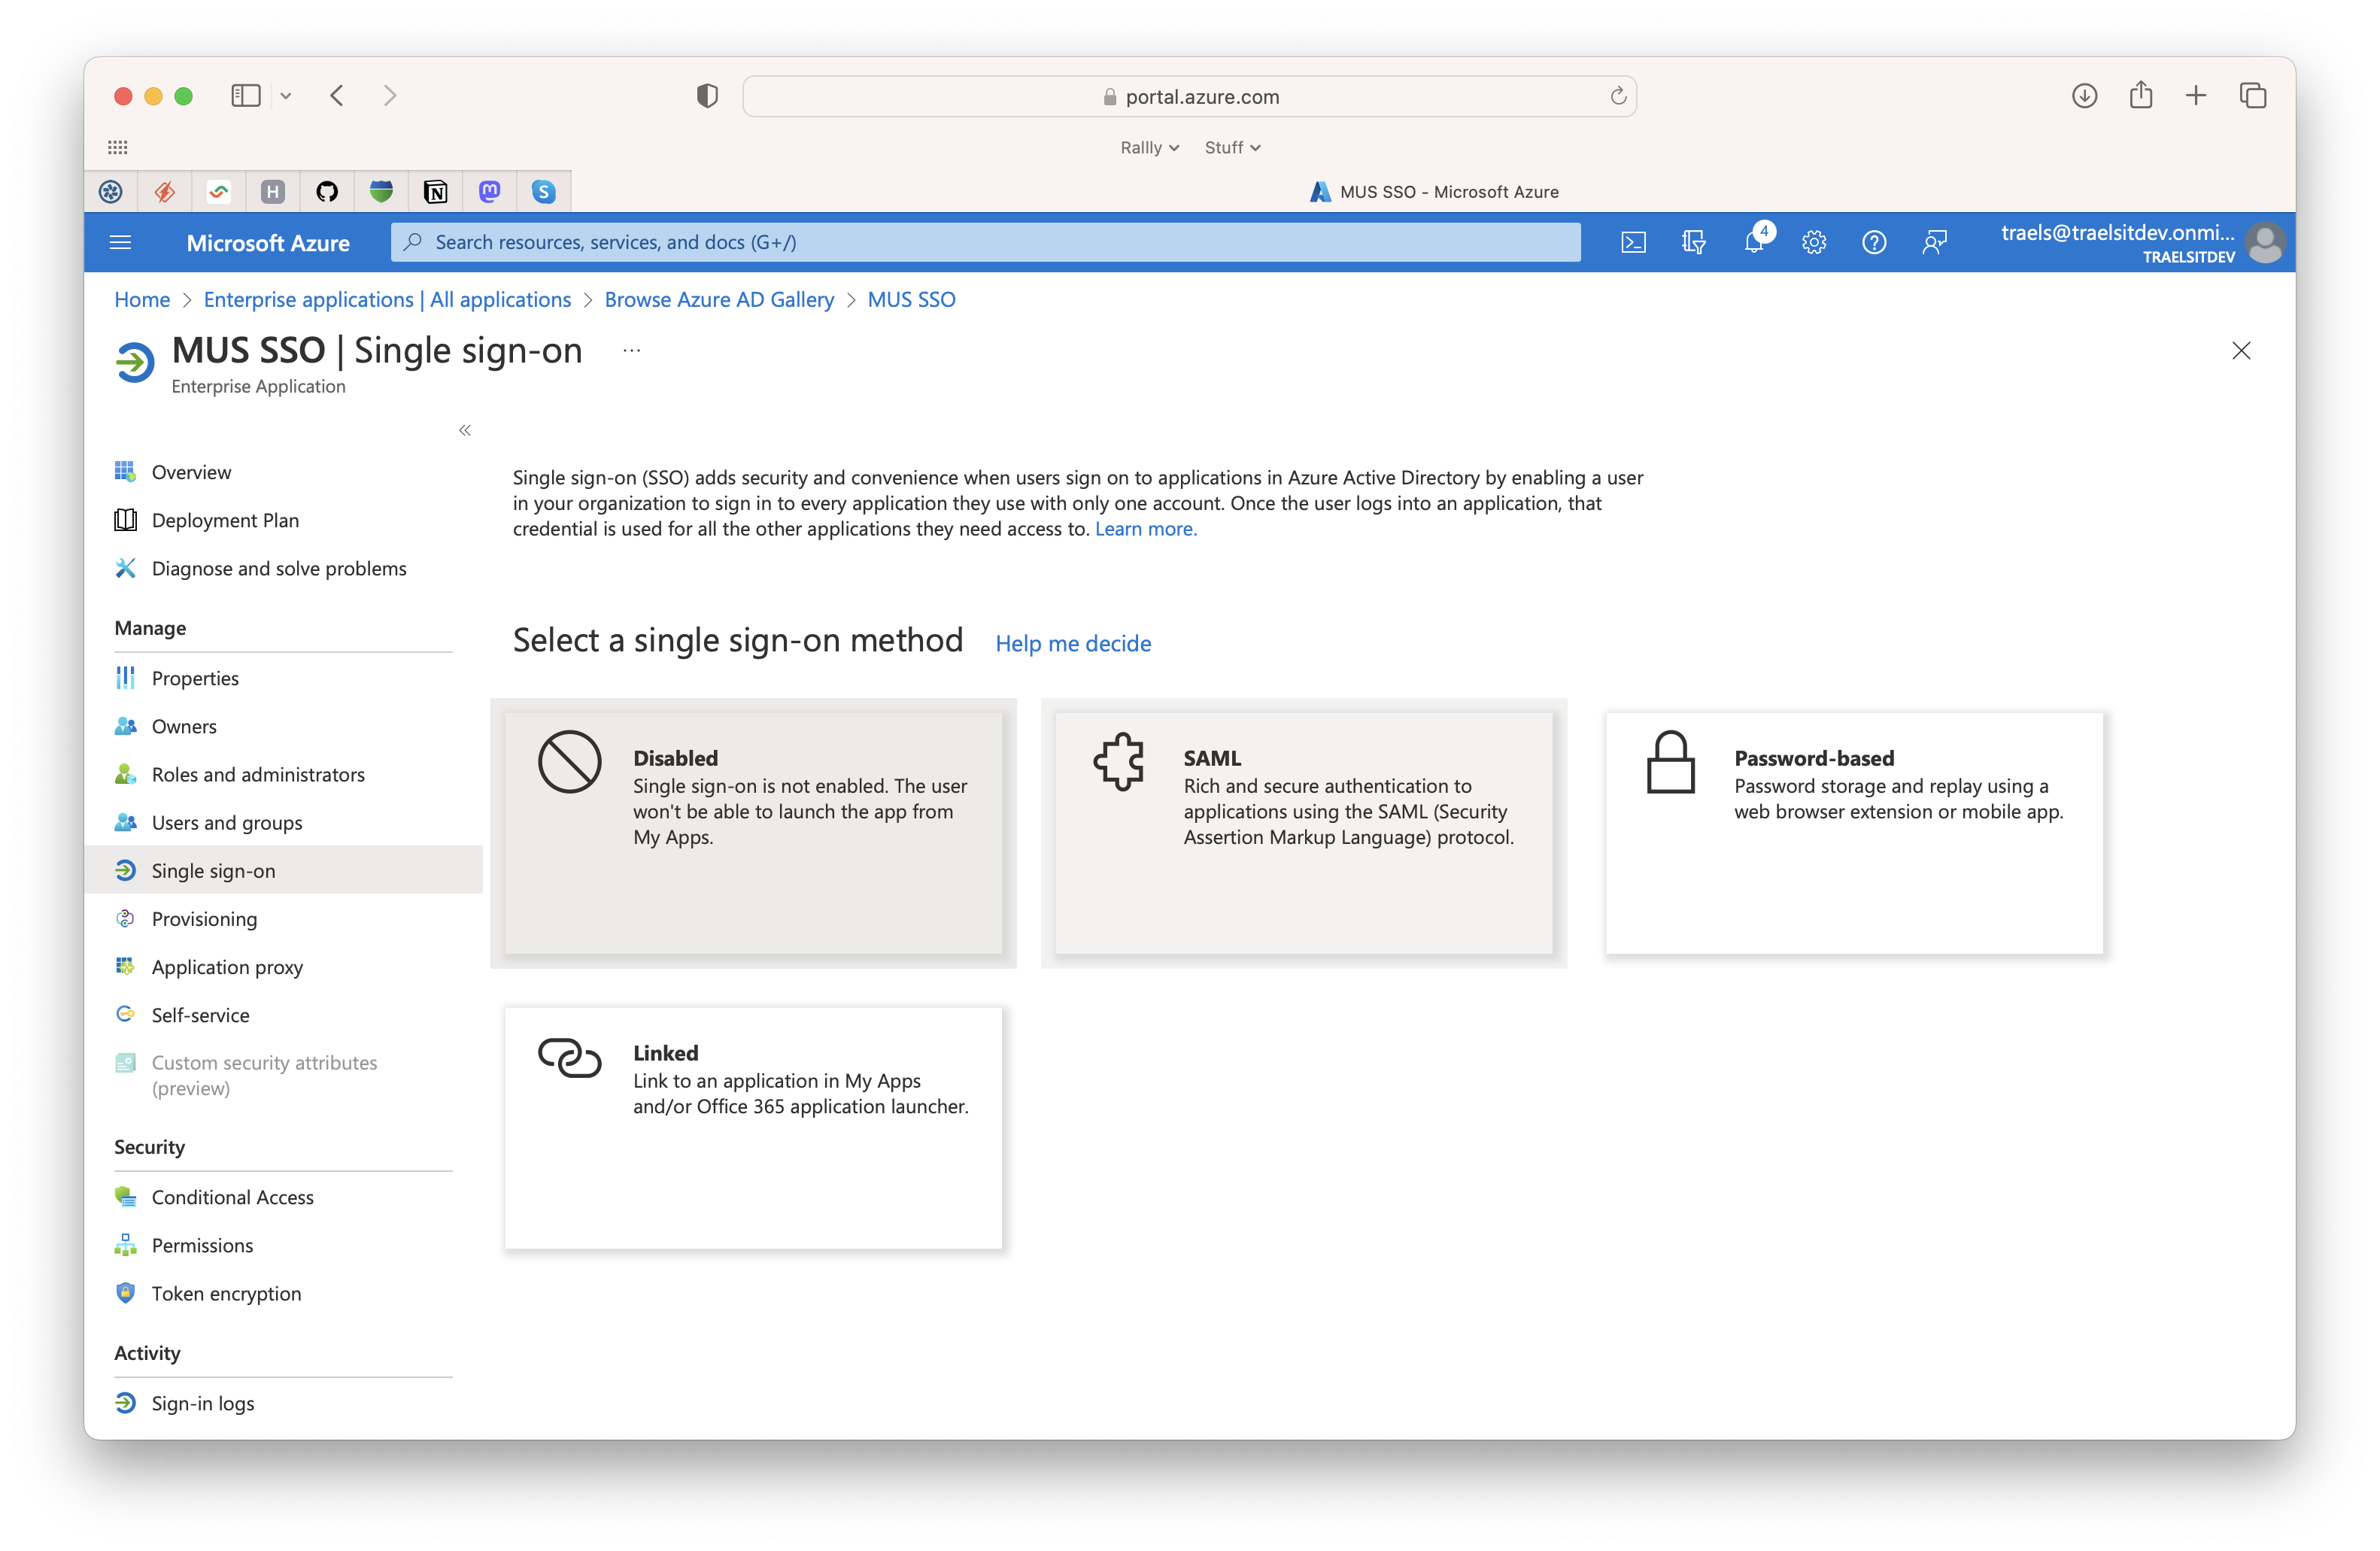
7) Click 🖊️Edit in step 1 Basic SAML Configuration.
-
Enter Identifier as "https://secure.evovia.com/saml/AFTALENUMMER/metadata/ad"
-
and Reply URL as "https://secure.evovia.com/saml/AFTALENUMMER/acs/ad"
Click 💾 Save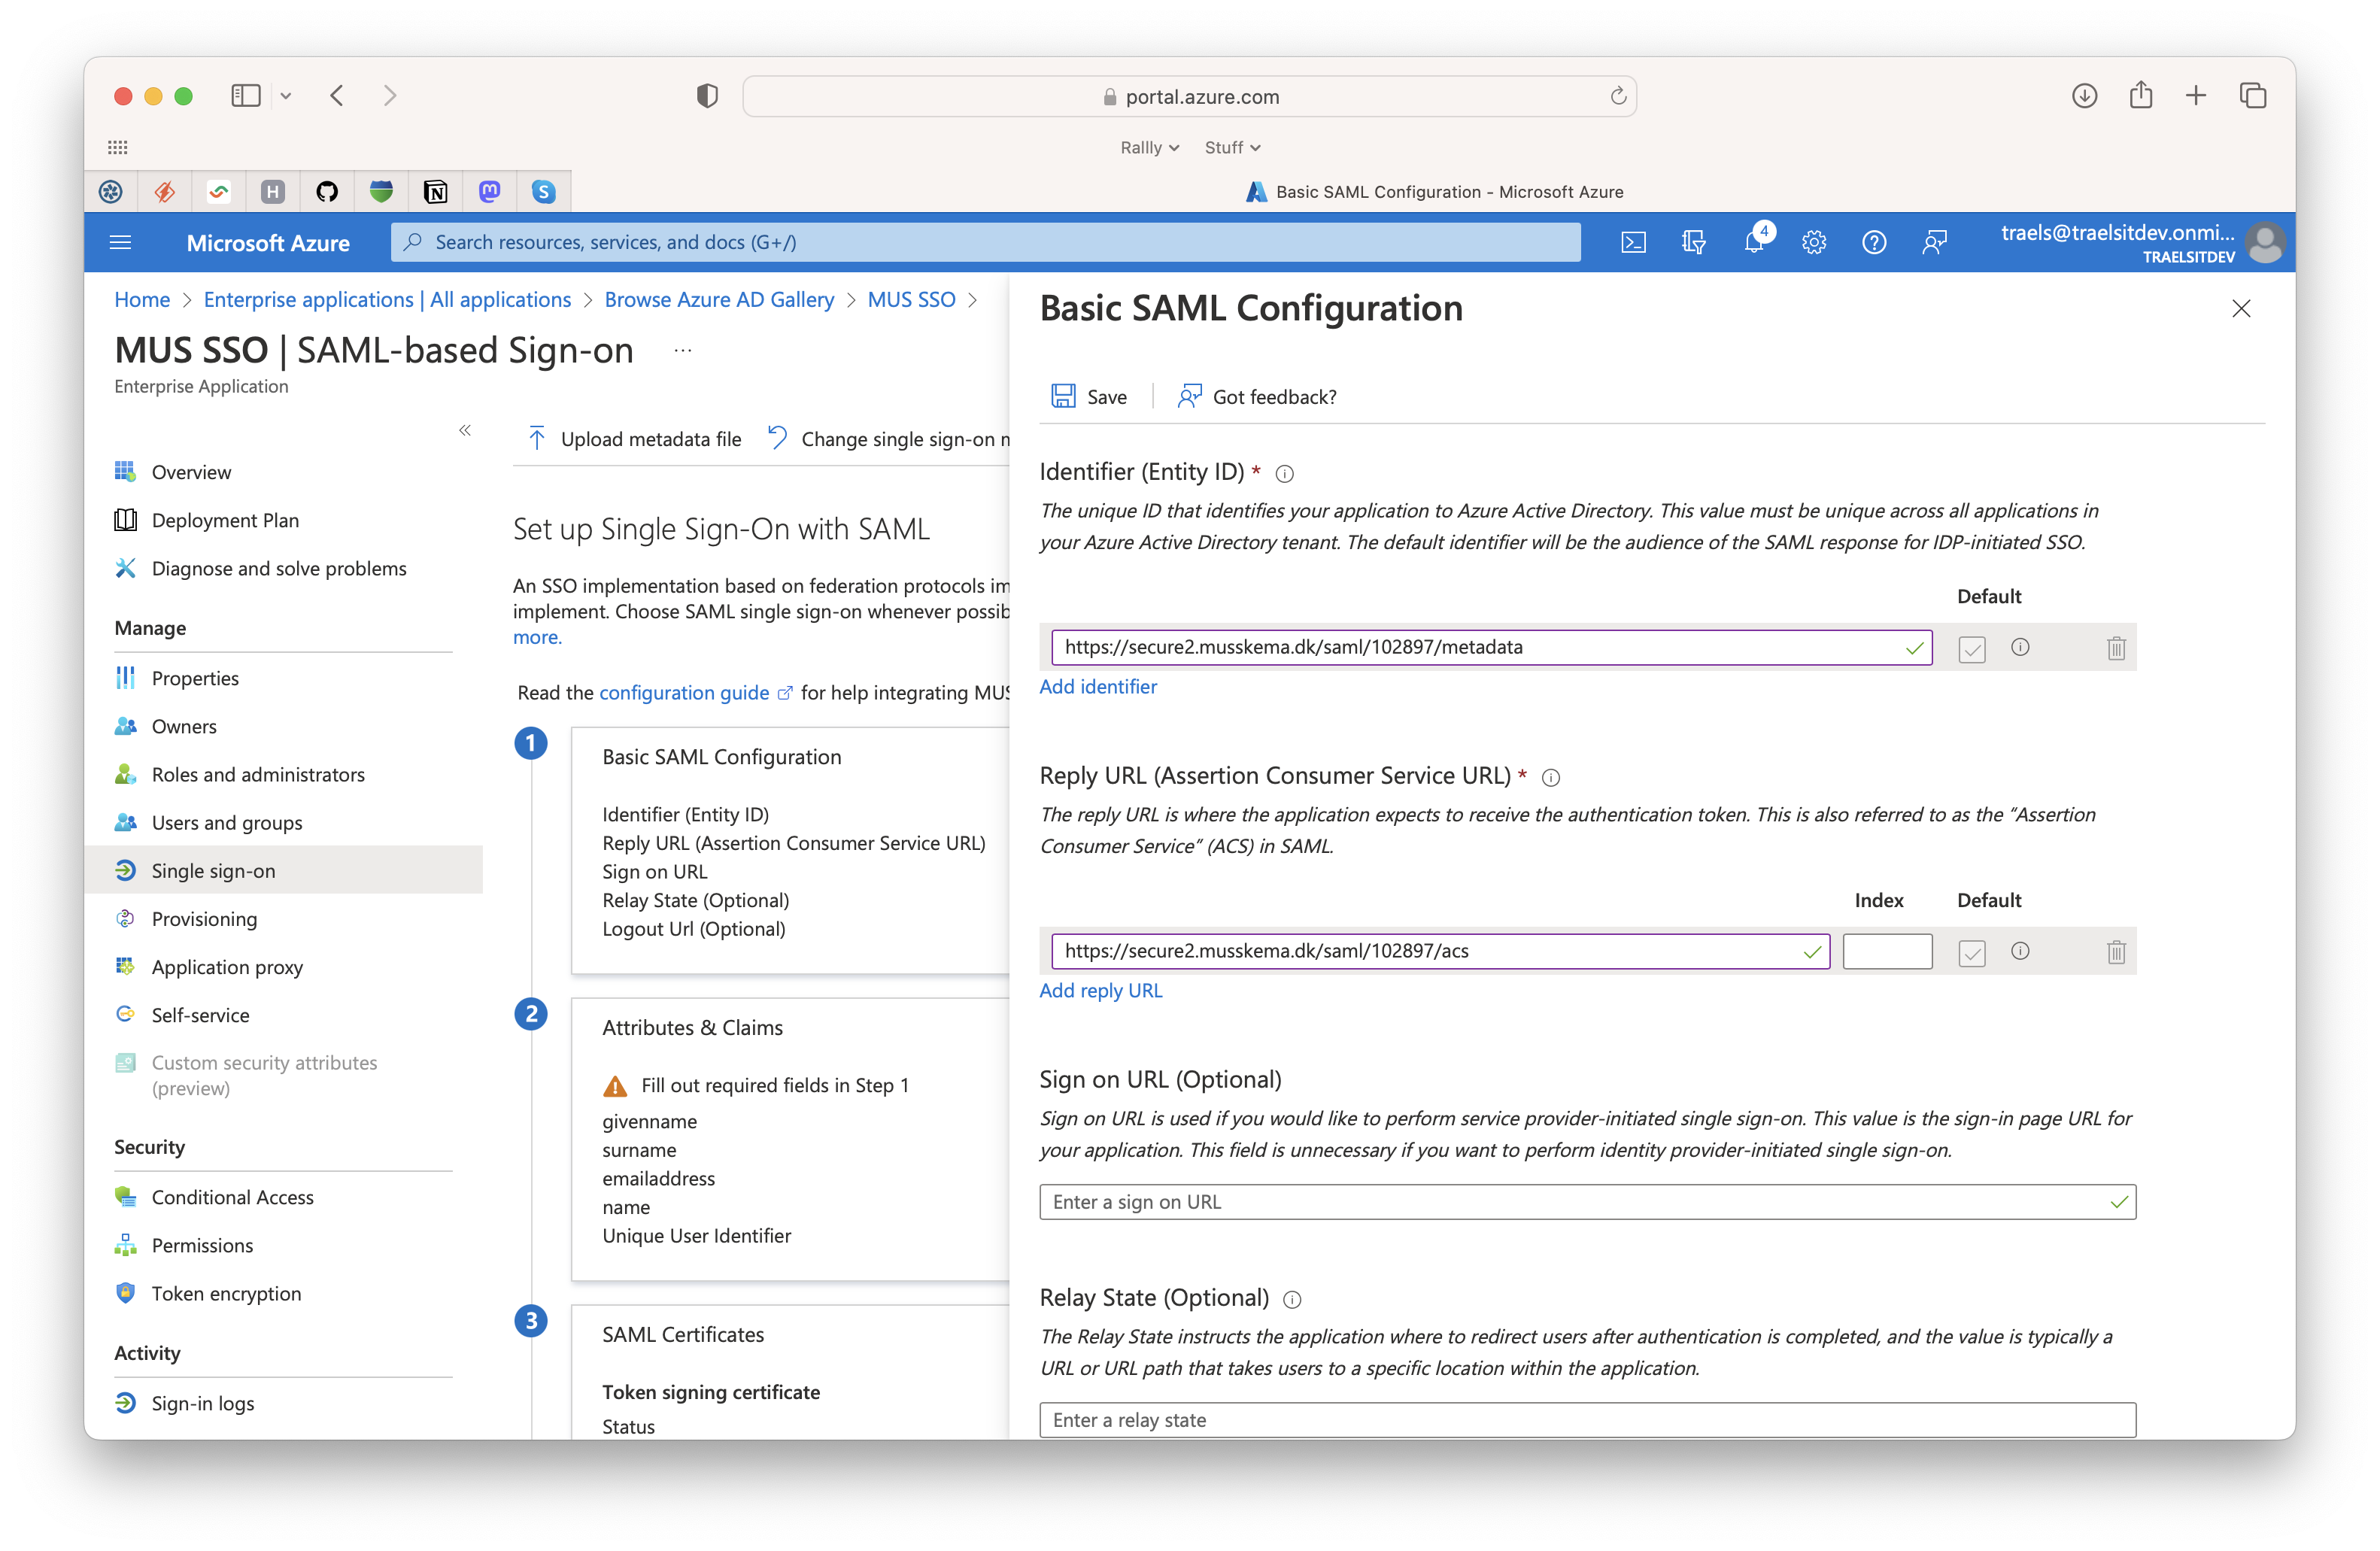
8) Click 🖊️Edit in step 2 Attributes & Claims. Click Unique User Identifier (Name ID).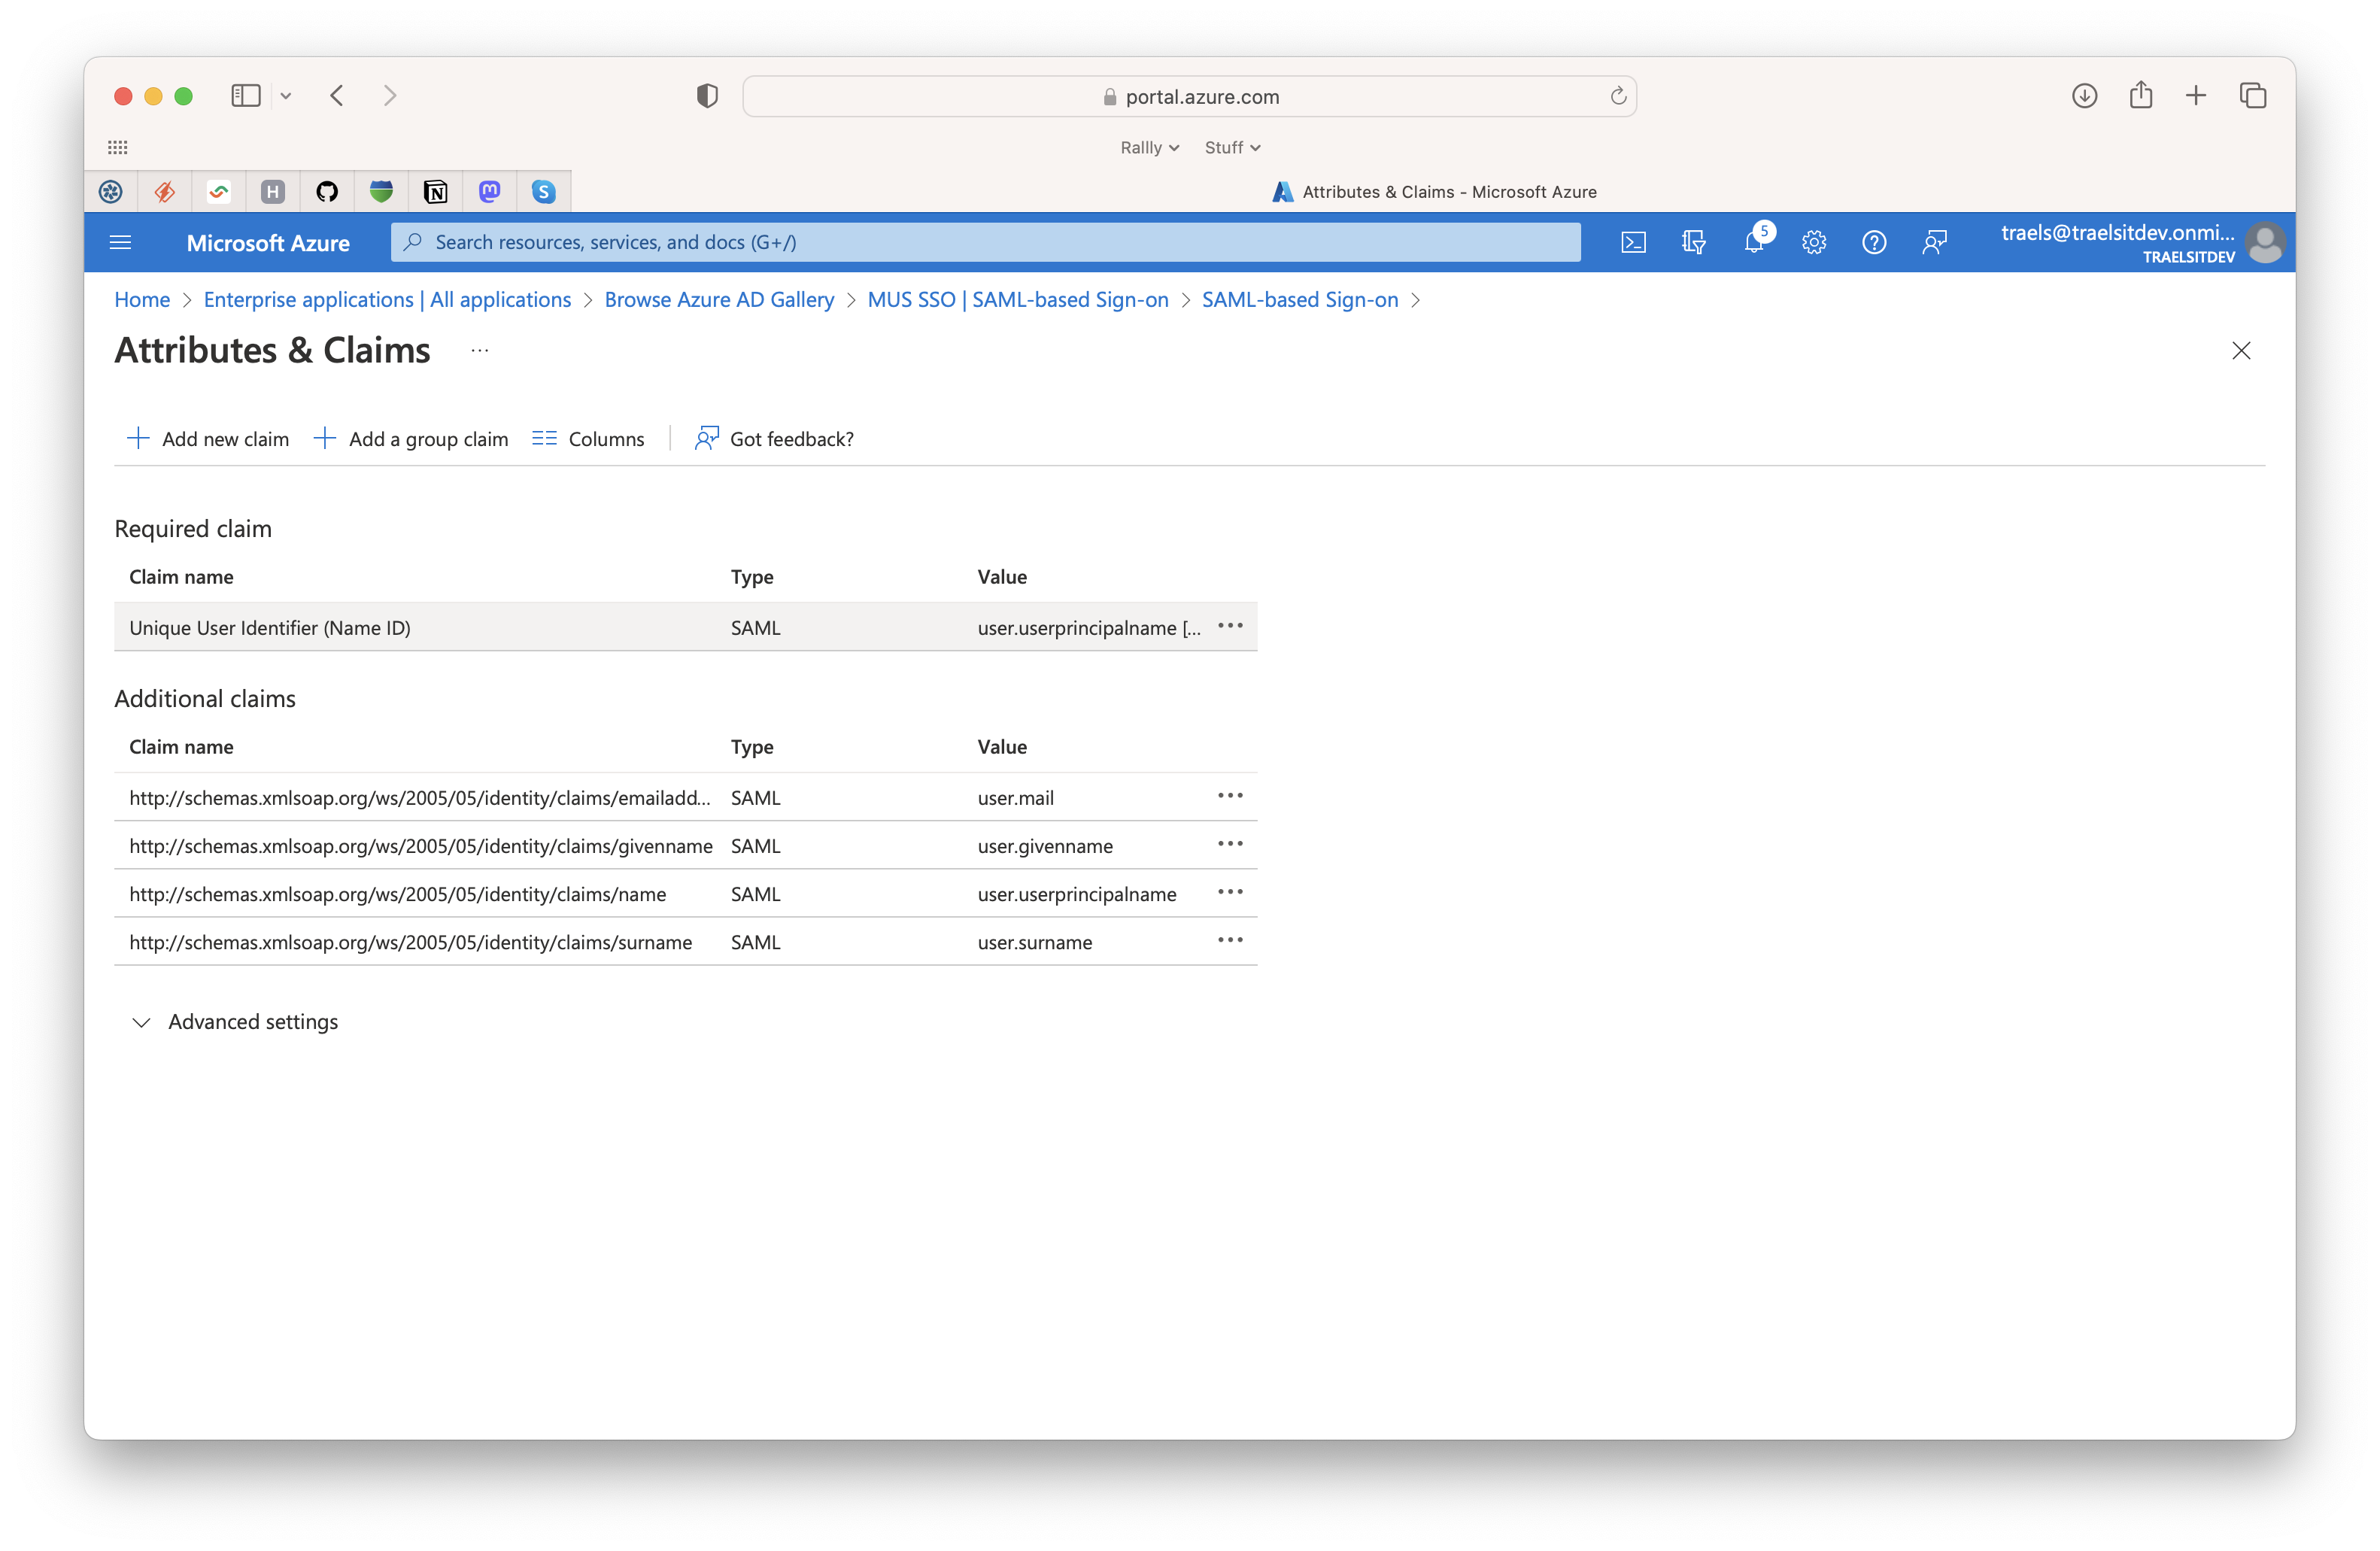
9) Setup the Name Identifier format as Persistent. Configure the Source attribute to be the users e-mail.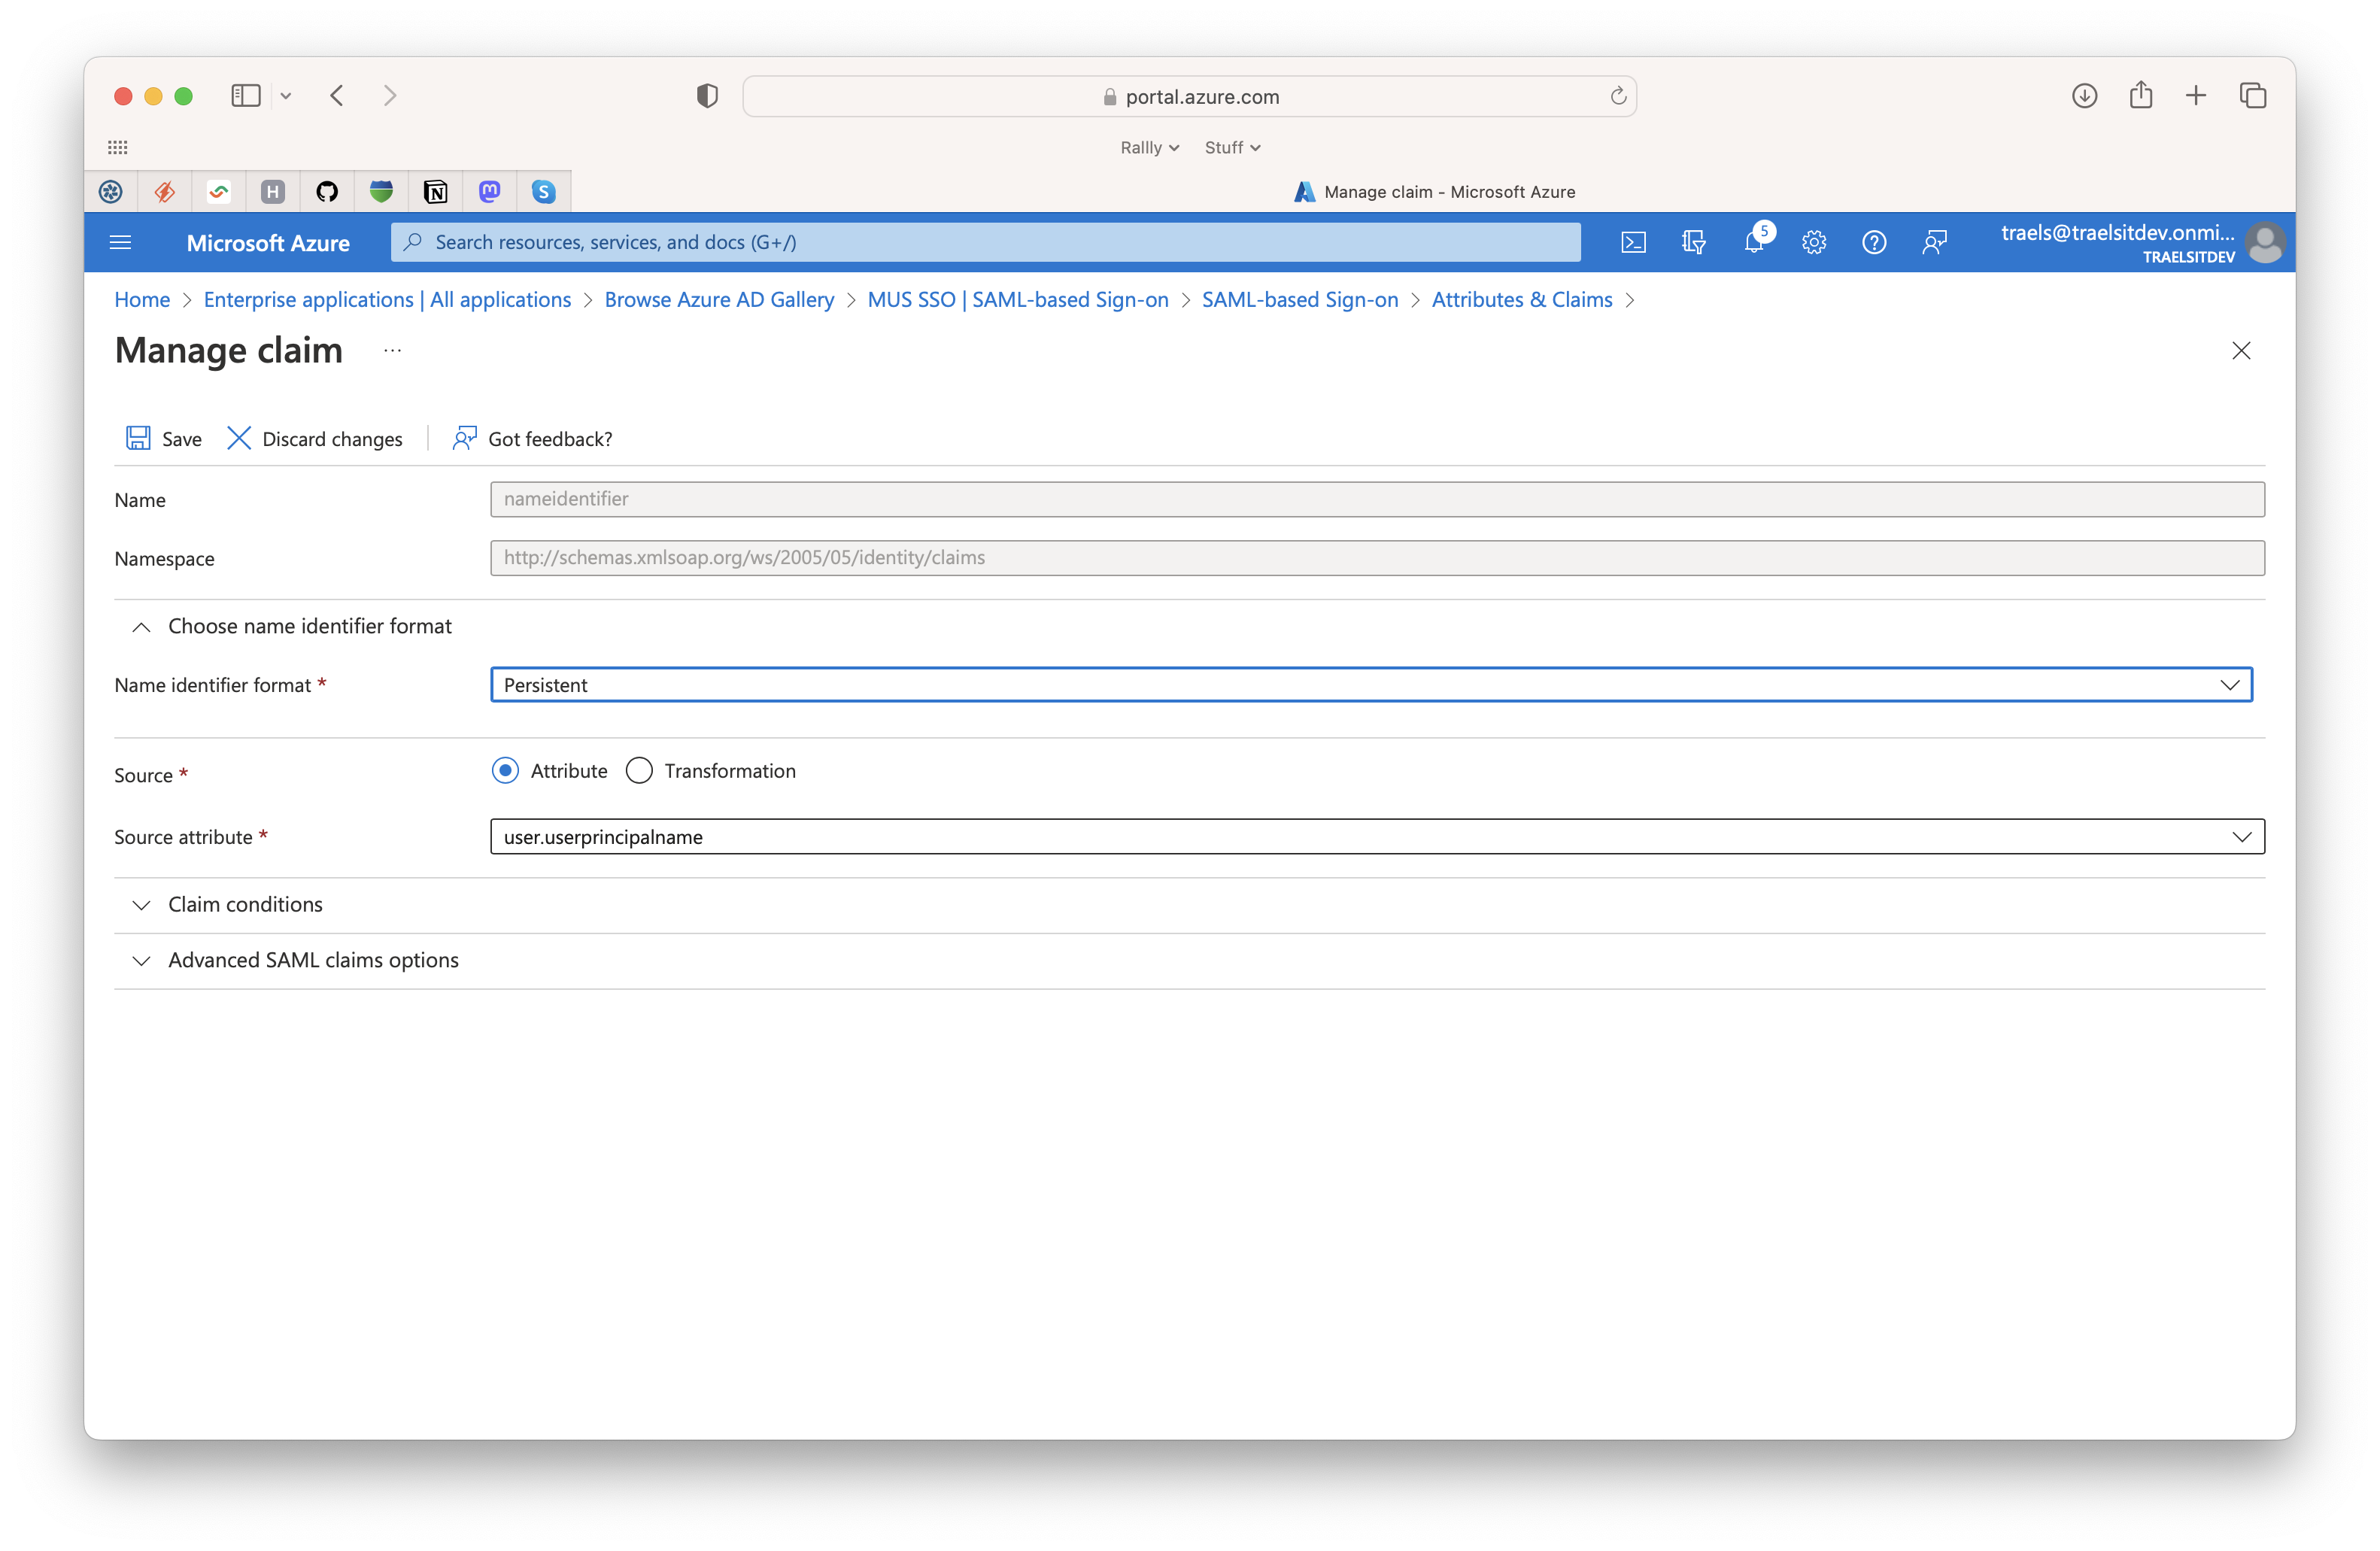
10) Copy the App Federation Metadata Url and send it to traels@evovia.com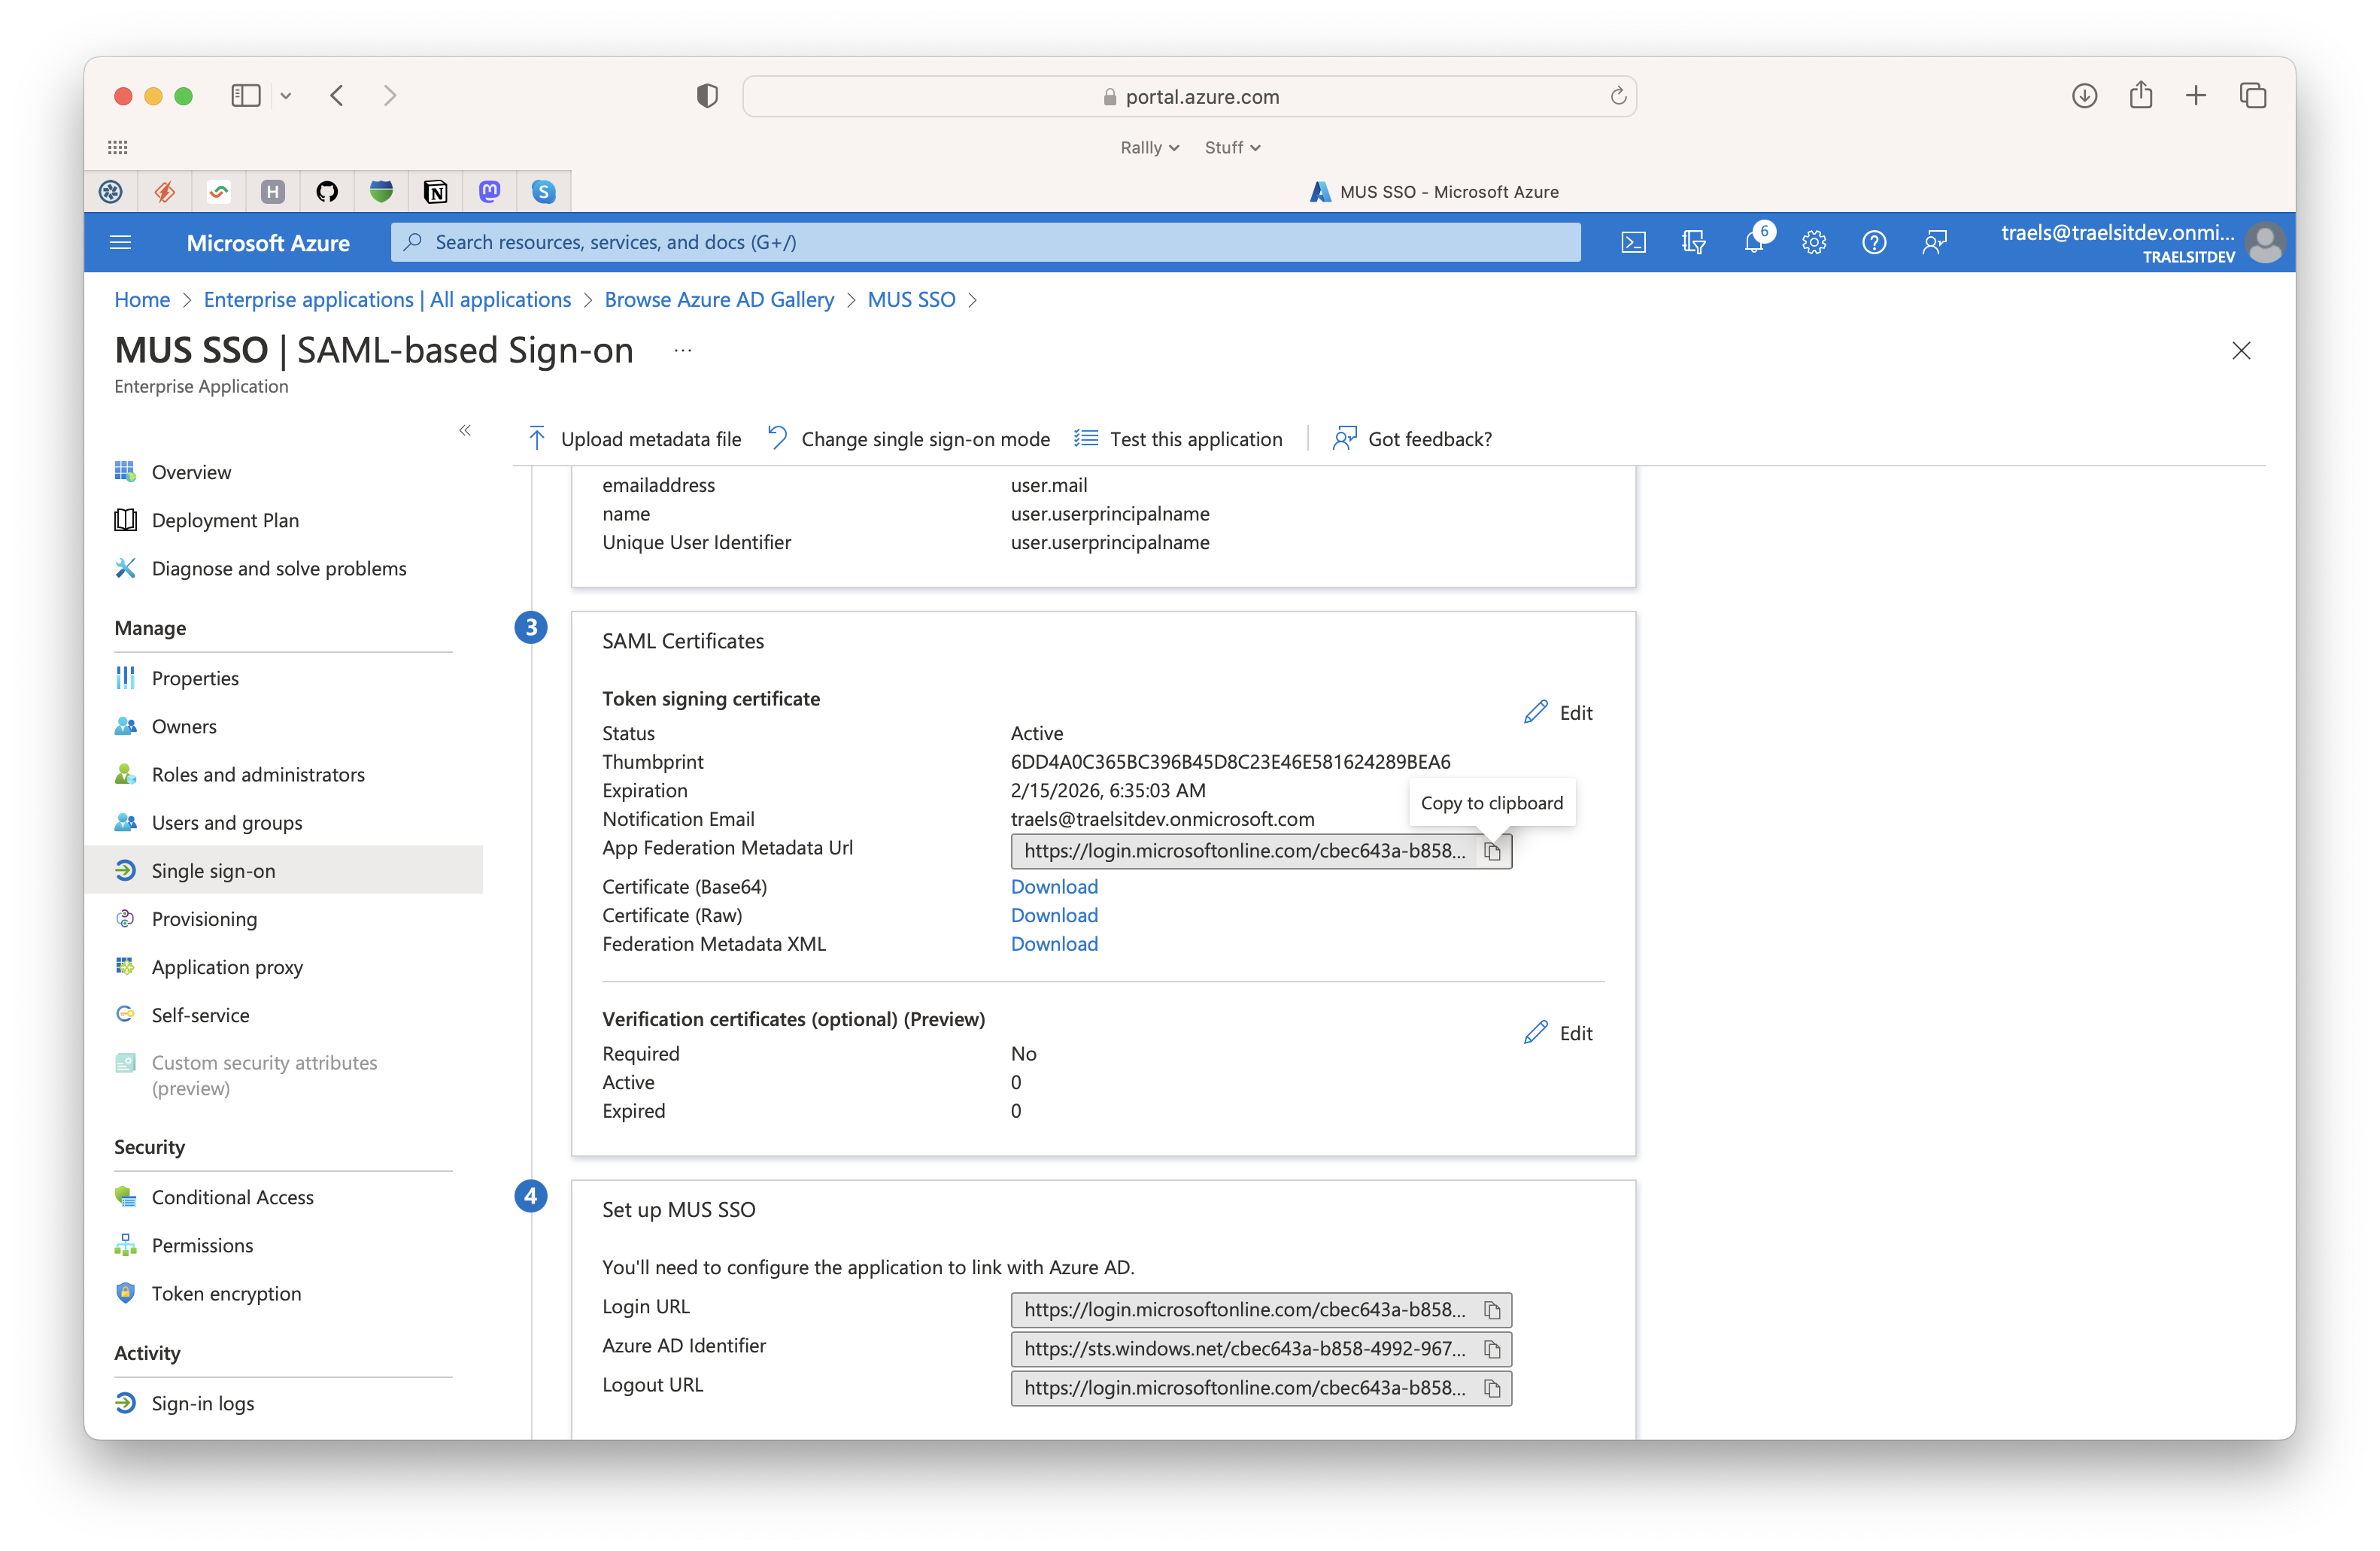
Direct link to login
If you wish to create a link directly to this SSO flow you can use https://secure.evovia.com/saml/AFTALENUMMER/init/ad.
You can also use https://secure.evovia.com/login?customer_no=AFTALENUMMER which sends the user to the logon page with customer number pre-filled. This solution is the right if you have multiple SSO providers or have some users logon with username and password.